Featured Articles
How to Lubricate and Maintain a Lazyboy Recliner Mechanism
A well‑maintained Lazyboy recliner should feel smooth, quiet, and solid for years. If yours has started squeaking, feeling stiff, or clunking as you recline, the mechanism probably needs a little cleaning, lubrication, and basic tightening. The good news: you can do most of this at home with simple tools and the right products.
If you want to go deeper into brand‑specific setup and troubleshooting, you can also check general guides and comparisons on LazyboyReclinersOnline.com while you work through the steps below.
Before You Start: Safety and Setup
Lazyboy mechanisms have moving linkages, springs, and sharp metal edges. Take a few minutes to make the job safe and comfortable:
- Clear a work area with enough space to tip the recliner onto its back or front.
- Ask for a helper if your chair is heavy or if it is a power/lift model.
- Unplug power cords and disconnect any battery pack on power or lift recliners.
- Remove loose items from the chair (remotes, cups, cushions you can lift off).
- Lay an old blanket or cardboard on the floor to protect both the recliner and your flooring.
What Kind of Lubricant Should You Use?
The goal is to lubricate metal‑to‑metal contact points without soaking the upholstery or attracting tons of dust.
- Use: A dry or semi‑dry silicone spray lubricant on pivots and sliding joints, and a light white lithium grease spray on heavier load points.
- Sometimes: A small amount of multi‑purpose machine oil on specific squeaky rivets or pins.
- Avoid: Thick axle grease, WD‑40 as a long‑term lubricant (it is more of a cleaner/water displacer), and any product that will drip into upholstery.
Check your owner’s manual for any brand‑specific recommendations; some finishes and parts may have preferred products or areas where you should not use lubricant.
Helpful Tools and Products
You do not need a full workshop, but these make the job easier and cleaner:
- Silicone spray with straw nozzle for precise application.
- White lithium grease spray for high‑load joints and tracks.
- Microfiber cloths and paper towels for wiping dirt and overspray.
- Small nylon brushes to scrub dusty joints and tracks.
- LED work light or headlamp so you can clearly see underneath.
- Basic socket set or wrenches for tightening bolts.
- Disposable gloves if you want to keep lubricant off your hands.
Step 1: Tip the Recliner and Locate the Mechanism
Most Lazyboy chairs are easiest to work on from the bottom:
- With the footrest closed, have a helper hold the chair steady.
- Tip the recliner gently onto its back or front, depending on access to the metal frame.
- Use your light to find the main mechanism: you will see a metal frame, pivot arms, springs, and scissor‑like linkages running to the footrest and back.
- Make a quick mental map or take photos—this helps later if you bump or move anything.
Step 2: Clean Off Dust and Old Grease
Lubricating over old, dirty buildup just makes a sticky mess. Start by cleaning:
- Use a vacuum with a crevice tool to remove loose dust, pet hair, and crumbs from around the mechanism.
- Wipe metal parts with a dry microfiber cloth to remove surface grime.
- If you see thick, dirty grease, gently wipe it away; you can leave a thin film but remove excess.
- Use a small nylon brush for stubborn debris in tight corners.
Avoid spraying heavy cleaners that could drip into the padding or fabric; a light wipe is usually enough.
Step 3: Identify Key Lubrication Points
On a typical Lazyboy mechanism, you want to focus on metal‑to‑metal contact areas:
- Pivots where the main arms connect to the base frame.
- Joints where the footrest linkage scissor arms pivot.
- Rocking or gliding joints (if your chair rocks or glides).
- Pivot points on the backrest brackets, if accessible.
- Springs and hooks where metal rubs against metal under load.
You do not usually lubricate plastic bushings that are designed to be self‑lubricating, or any area where grease would obviously contact upholstery or wood trim.
Step 4: Apply Silicone and Grease Carefully
Now you can start lubricating:
- Shake your silicone spray and attach the straw for precise control.
- At each pivot or sliding joint, give a short, controlled burst right where the metal parts move against each other.
- Cycle the mechanism a few times by moving the footrest and back (with the chair still tipped) to work the lubricant in.
- On heavier load points—like the main rocking pivots or big scissor joints—add a small amount of white lithium grease spray.
- Immediately wipe any overspray from wood parts, plastic trim, or fabric with a clean cloth.
Use the minimum amount needed. The goal is a thin film, not dripping lubricant.
Step 5: Tighten Bolts and Screws While You Are There
A lot of “noise” and looseness is actually from hardware backing off over time:
- With the chair still tipped, go around the frame and gently check each visible bolt and nut.
- Use a small socket set or wrench to snug loose fasteners (do not over‑tighten, especially into wood).
- Check screws holding brackets to the wooden frame; snug them carefully to avoid stripping.
- Look for any missing bolts or nuts; if you find one, replace it with a similar grade and size.
This is a great time to note any parts that look bent, cracked, or excessively worn so you can plan a repair or part replacement later.
Step 6: Test the Recliner Upright
Once the mechanism is cleaned, lubricated, and hardware checked:
- Carefully tip the recliner back to its normal position.
- Sit down and slowly operate the footrest and back through their full range several times.
- Listen for squeaks, pops, or grinding noises; they should be much quieter or gone.
- If you still hear a specific squeak, tip the chair again and focus lubricant on the joints that correspond to that motion.
On power or lift models, plug the chair back in only after you are sure there are no tools or rags trapped in the mechanism.
How Often Should You Lubricate a Lazyboy Recliner?
Frequency depends on use and environment, but a simple schedule works for most homes:
- Light use (a few times per week): quick inspection and spot lubrication once a year.
- Daily use: clean and lubricate high‑load joints every 6–12 months.
- Heavy use or households with kids/pets: do a quick underside check every 6 months for loose hardware, hair buildup, or obvious dry joints.
You do not need to strip and soak everything in lubricant—think of it like an oil change for the mechanism: periodic, targeted, and light.
Common Squeaks and What to Check
If you still have a specific noise after basic maintenance, try matching the sound to a likely cause:
- Squeak when rocking only: Focus on the rocking or gliding pivots where the base meets the main frame; clean and lubricate those points again.
- Click or pop when raising the footrest: Check the footrest scissor arms and the pivot where they attach to the base and front rail.
- Grinding feel when reclining: Look for misaligned linkage arms, missing washers, or a bent bracket rubbing metal‑to‑metal.
- Squeak at one side of the back: Inspect the backrest brackets and their pivots; a tiny shot of silicone at those joints often helps.
If you suspect a part is damaged rather than just dry, you may want to look up replacement options or guides on removing the back and accessing deeper parts of the frame from resources similar to those on Lazyboy‑focused repair and review sites.
When Not to DIY Lubrication
Lubrication and tightening are safe DIY tasks in most cases, but there are times to step back:
- The chair is under warranty and any disassembly might void coverage.
- You see cracked welds, broken springs, or major bends in the frame.
- The mechanism is binding so hard that it feels unsafe to operate.
- You are working on a complex power/lift chair and are not comfortable around moving actuators.
In those cases, contacting Lazyboy customer service or a local furniture repair specialist is the better move.
Summary
Lubricating and maintaining a Lazyboy recliner mechanism is mostly about three things: cleaning away dust and old grease, applying the right light lubricants in the right places, and tightening hardware before it becomes a problem. With a can of silicone spray, some white lithium grease, basic hand tools, and 30–60 minutes, you can usually turn a noisy, stiff recliner back into a smooth, quiet, and comfortable chair that feels closer to new again.
How to Replace the Cables on a Lazyboy Recliner Handle
The cable that runs from your Lazyboy recliner handle to the release mechanism is what lets the footrest pop open when you pull the handle. Over time, that cable can stretch, fray, or snap. Sometimes the plastic sheath cracks, the metal hook bends, or the cable slips out of its bracket. The result is a handle that feels loose, pulls with no resistance, or does nothing at all. Replacing the cable is usually a straightforward DIY job. With a compatible replacement cable, a few basic tools, and a careful look at how your existing cable is routed, you can get your recliner working again in less than an afternoon.
What You'll Need Before You Start
Having the right tools and parts on hand will make the job quicker and a lot less frustrating.
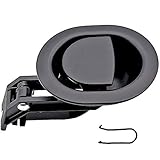
- Replacement recliner cable compatible with Lazyboy-style handles – you can start with a search for a Lazy Boy recliner release cable.
- Possibly a new handle if yours is cracked – look for a recliner pull handle with cable kit.
- Phillips and flathead screwdrivers, or a simple ratcheting screwdriver set.
- Needle-nose pliers for removing clips and bending hooks.
- Staple remover or putty knife (if you need to peel back the dust cover).
- Flashlight or headlamp so you can see under the chair.
- Zip ties to secure the new cable along its path.
If you want a deep-dive walkthrough dedicated specifically to D-ring style cables, there is an excellent step-by-step article on how to replace and install a Lazyboy recliner cable D-ring that pairs well with this guide.

KUANYUOO Universal Heavy-Duty Metal Pull Recliner Handle with Cable (Exposed Adjustable 4.7" to 5.2"), Fits Ashley and Other Manufacturer Brands Chair Release Handle for Sofa or Recliner

ttmagic Metal Recliner Handle Replacement Parts with Cable, Universal Recliner Sofa Chair Couch Release Lever Pull Handle, Fits Ashley and Major Recliner Brands, Exposed Cable Length 4.9“
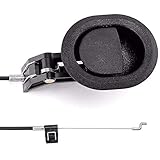
ttmagic Sofa Chair Recliner Release Pull Handle 3" by 3.5" Replacement Parts with Cable, Fits Ashley Lazy Boy and Most Recliner Brands Couch Sofa Chair Furniture, Exposed Cable Length 4.9"
Step 1: Confirm the Cable Is the Real Problem
Before you start pulling things apart, it is smart to make sure the cable is actually at fault.
- Pull the handle and pay attention to how it feels. A “floppy” handle with no resistance often means the cable has snapped or come loose.
- Watch the mechanism under the chair (you may need a helper). If nothing moves when you pull the handle, the cable is likely broken or disconnected.
- If the mechanism moves but the footrest does not release, you may have a separate footrest or lock problem.
- Visually inspect the cable where it exits the handle and where it connects near the mechanism. Frayed strands, kinks, or a detached hook are clear signs that a replacement is needed.
If you suspect there might be additional issues beyond the cable itself, you can use the broader checklist in how to troubleshoot your Lazyboy recliner to rule out other problems at the same time.
Step 2: Remove the Handle from the Side of the Recliner
Most Lazyboy-style handles are secured with a couple of screws through a plastic or wooden bezel.
- Locate the screws around the handle. They are usually on the inside of the arm or directly on the handle housing.
- Use the appropriate screwdriver to remove these screws and set them aside somewhere safe.
- Gently pull the handle assembly away from the side of the chair. The cable will still be attached, so let it hang carefully rather than yanking it out.
- Take a photo of how the cable attaches to the handle – this will make reassembly much easier later.
If your handle is cracked, worn, or wobbly, this is also the perfect time to upgrade it with a more durable metal-style replacement handle and cable combo.
Step 3: Flip the Recliner and Expose the Mechanism
Next, you will need to see where the cable hooks into the reclining mechanism.
- Carefully turn the recliner onto its side or front so you can access the underside. Protect the upholstery with a blanket if needed.
- Locate the dust cover (black or thin fabric) under the seat. On some chairs, you can work around it; on others, you may need to loosen one edge.
- If necessary, use a staple remover or putty knife to lift enough of the dust cover to reach the cable and mechanism connection point.
- Follow the existing cable from the handle side into the chair until you find where it attaches to the metal latch or release lever.
Take another photo of the cable path and attachment point. These pictures are your “map” when routing the new cable.
Step 4: Disconnect and Remove the Old Cable
Once you can see both ends of the cable, you are ready to remove it.
- At the mechanism end, locate the hook, eyelet, or fitting that attaches the cable to the release lever.
- Use needle-nose pliers to unhook the cable from the lever. Be mindful of springs and moving parts.
- Look for any retaining clips or brackets that hold the cable sheath in place. Gently pry these open or slide the cable out.
- From the handle side, release the cable from the handle assembly (usually by lifting a small metal tab or sliding the cable end out of its slot).
- Pull the cable out of the chair, taking note of how it was routed around springs, bars, and other hardware.
Once the old cable is out, set it on a table so you can use it as a template for your replacement.
Step 5: Match and Prepare the New Cable
Getting the right replacement cable is crucial. Length and end fittings must be correct for smooth operation.
- Lay the old cable next to your new one. Compare the overall length, exposed inner cable length, and sheath length.
- Make sure the handle end and mechanism end hardware (D-ring, S-hook, barrel, etc.) match your original.
- If your new cable is slightly longer than the original, that is usually okay as long as the exposed length is close. Too short, however, will not work.
- If you haven't ordered a cable yet, you can use your old cable measurements to find a suitable replacement by searching for a recliner cable D-ring replacement.
If you are unsure about specs or where to source parts, the article on finding Lazyboy recliner parts has practical tips about measurements and where to buy.
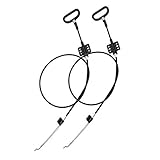
2 Pieces Recliner Release Cable Replacement D-Ring Pull Handle, Exposed Length 4.75" with S Tip

Nonley Sofa Recliner Cables, 2 Pack Couch Release Cables Recliner Replacement Parts D Ring Couch Recliner Pull Handle, Hook Exposed Cable with S Tip for Sofa, Black

ttmagic 2Pcs Recliner Cables Replacement D-Ring Pull Handle, Metal Recliner Release Handle, Exposed Cable Length 4.9", Total Length 42.5", Fit Ashley and Most Recliner
Step 6: Route and Install the New Cable
Now you are ready to install the new cable along the same path as the old one.
- Starting from the handle side, feed the new cable through the arm opening and into the body of the chair, following the same route as the original.
- Snap or slide the cable sheath into any brackets or guides that kept the original cable in place. This prevents rubbing or pinching when you recline.
- Use zip ties to secure the cable to the frame where needed, but do not over-tighten – the cable should be held, not crushed.
- At the mechanism end, hook the cable into the latch or release lever exactly as the old one was attached.
- Reinstall any retaining clips that hold the cable sheath in position.
Keep checking that the cable moves freely when you pull on the handle end. There should be no sharp bends or kinks.
Step 7: Reattach the Handle and Fine-Tune the Tension
With the cable installed, you can now reassemble the handle.
- Attach the cable end to the handle assembly the same way the original was installed – usually by slipping a barrel or pin into a slot.
- Position the handle back into its opening on the side of the chair.
- Reinstall the mounting screws and tighten them evenly so the handle sits flat and secure.
- Test the handle a few times with the chair still on its side. The mechanism should move smoothly, and the footrest should release firmly when fully assembled.
If it feels like you have to pull the handle too far or the footrest pops open with barely any movement, you may need to adjust where the cable hooks into the mechanism (using a different hole or notch) or try a slightly different cable length.
Step 8: Close the Dust Cover and Test the Recliner
Once everything feels right, you can button the chair back up.
- Return the dust cover to its original position and re-staple or reattach it if you pulled it back earlier.
- Carefully roll the recliner back onto its feet.
- Sit in the chair and test the handle multiple times: open, close, and partially recline to make sure the cable does not bind.
- Listen for any rubbing, scraping, or popping noises that might indicate the cable is catching on something inside.
If everything works smoothly, your new cable is properly installed and ready for regular use.
When to Replace the Entire Handle and Cable Assembly
In some cases, it makes more sense to replace the handle and cable as a complete unit instead of just the cable.
- If the handle is cracked, loose, or badly worn, a fresh assembly will feel sturdier and last longer.
- If the mechanism end hardware on your old cable is badly bent or corroded, a complete recliner handle replacement with cable is often the simplest solution.
- If you are not sure which specific cable your model uses, handle+ cable kits give you matched parts and save some guesswork.
Safety and Warranty Tips
Replacing a handle cable is generally safe, but there are a few extra points to keep in mind.
- Always unplug power before working on electric recliners.
- Be aware that springs and moving parts can pinch fingers; never put your hands in the path of a moving mechanism.
- If your recliner is still under warranty, check whether the cable and handle are covered before buying parts yourself.
- For complex or multiple issues (cable plus frame or motor problems), it may be worth combining your cable replacement with other repairs in a fuller DIY session or calling in professional help.
Conclusion
A broken or stretched cable on a Lazyboy recliner handle can make an otherwise comfortable chair feel useless, but the fix is usually well within DIY reach. By carefully removing the old cable, matching a proper replacement, and routing it along the original path, you can restore smooth handle action and reliable footrest release.
If you take photos as you go, label your parts, and follow structured guides like the dedicated D-ring replacement tutorial and the general troubleshooting resources on LazyboyReclinersOnline.com, you will not only save money on repairs but also gain confidence in maintaining your recliner for years to come.
Fixing a Lazyboy Recliner That Leans to One Side
A Lazyboy recliner that leans to one side usually has an issue with the base, frame, springs, or mechanism being out of alignment. Sometimes it is something simple, like one leg sitting on a thick rug or a loose bolt on one side. Other times, a bent frame rail or broken spring is causing the chair to sag. Fixing the lean starts with a careful visual check, then tightening, leveling, and finally inspecting internal parts.
Step 1: Confirm It’s Not the Floor or a Leg Issue
Before you assume there is a serious problem with the recliner, make sure the surface it sits on is level.
- Move the recliner to a different spot in the room, preferably on a hard, flat surface like tile or wood.
- Check if one corner of the base is resting on a rug edge, cable, or uneven floorboard.
- Inspect the legs or base corners for damage. If one glide or leg is shorter, you can temporarily use furniture leveling shims to even things out.
If the recliner still leans when it is on a perfectly flat floor, the problem is inside the chair itself.
ttmagic Metal Recliner Handle Replacement Parts with Cable, Universal Recliner Sofa Chair Couch Release Lever Pull Handle, Fits Ashley and Major Recliner Brands, Exposed Cable Length 4.9“
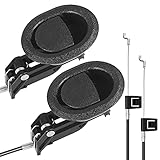
Baridwon Recliner Replacement Parts with Pull Handle and Release Cable (2-Sets), Repair Recliner Mechanism Parts Compatible with Most Furniture of Recliner Sofa Couch Chair

Baridwon 2 Set Recliner Replacement Parts, Durable Recliner Release Pull Handle with Recliner Pull Cable, Repair Replacement Parts Compatible with Most Furniture of Recliner Chair Sofa Couch
Step 2: Flip the Recliner and Inspect the Base Frame
Most fixes for a leaning recliner require looking underneath.
- Carefully tip the recliner onto its back or side. Have someone help you if the chair is heavy or powered.
- Use a flashlight to examine the base frame, crossbars, and mounting points.
- Look for any bent metal, cracked welds, or damaged wooden rails on the side where the chair leans.
- Check for missing or loose bolts connecting the base to the rest of the frame.
If you are not sure what you are looking at, it may help to compare what you see with the layouts shown in the Lazyboy recliner parts diagram and manual.
Step 3: Tighten Loose Bolts and Fasteners
A common cause of leaning is that fasteners on one side have worked loose over time.
- Locate the bolts and screws that connect the base frame to the seat and side rails.
- Use the proper tools (usually a Phillips screwdriver and socket or a ratcheting screwdriver set) to snug each one down.
- Tighten fasteners on both sides of the chair, not just the leaning side, so the frame pulls back into even alignment.
- If any bolts seem to loosen repeatedly, consider replacing them and adding a drop of medium strength thread locker to hold them in place.
After tightening, set the recliner upright and test it again. If the lean is reduced or gone, you may have already solved the problem.
Step 4: Inspect Springs and Support on the Leaning Side
If the chair still leans, the support system on one side may be weaker.
- With the chair still on its side, look for seat springs, zig-zag springs, or tension springs that run across the bottom.
- Compare the height and shape of the springs on the leaning side with those on the opposite side.
- Look for broken, stretched, or disconnected springs. Any spring that droops lower on one side can cause the chair to sag.
- If you see a damaged spring, you can often replace it yourself using a suitable recliner spring replacement kit and basic tools.
For more detail on replacing springs and understanding how they support the chair, you can review the instructions in how to replace a recliner tension spring.
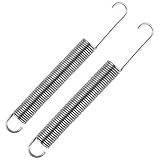
Zookpr 2Pcs 7 Inch Recliner Springs Replacement Sofa Chair Mechanism Spring

Dewuyanse 7 Inch Recliner Springs Replacement, Stainless Steel, Couch Spring Repair Kit
Step 5: Check the Reclining Mechanism and Side Rails
Sometimes the lean is due to the reclining mechanism itself being twisted or one side bracket slipping out of place.
- Follow the metal rails from the base up toward the seat and back on both sides.
- Look for any gaps where a bracket should sit flush against the frame.
- Make sure both sides of the mechanism are bolted in the same hole positions and that no linkage is bent.
- If a side bracket has shifted, loosen the bolts slightly, realign it, then tighten everything down evenly.
If your recliner also has trouble locking into position, or seems to slip backward or forward unexpectedly, you may be dealing with related issues described in the site’s guide to Lazyboy recliner 3-position locks and repairs.
Step 6: Examine the Backrest Alignment
A misaligned backrest can give you the feeling that the entire recliner is leaning.
- With the chair upright, stand behind it and check whether the backrest is tilted more to one side.
- Gently rock the backrest left and right; if it wiggles, the locking brackets may not be fully engaged.
- Remove the backrest according to the instructions for your model, then reinstall it carefully, making sure the brackets click or lock fully into place.
If you suspect a more general back or side joint issue, the broader guide on how to troubleshoot your Lazyboy recliner walks through checking the back brackets, side joints, and more.
Step 7: Reinforce or Repair a Bent Frame
If you see a clearly bent metal bar or cracked wooden rail on one side, you have likely found the main cause of the lean.
- Minor bends in metal brackets can sometimes be straightened with an adjustable wrench or clamp, but do this slowly to avoid snapping the metal.
- Cracked wood should not be ignored. For small splits, you can inject a suitable wood repair epoxy and clamp the rail until it cures.
- Severely damaged frame components usually require replacement parts. You may be able to find compatible components via a Lazy Boy recliner replacement parts search.
- If the structural damage is extensive, consider whether professional service or a full chair replacement makes more sense.

Wirktive Smart Bed with Massage Recliner Chair - Luxury Bed Frame Queen Size with Reading Light, USB Port and Speaker, Multifunctional Upholstered Bed Frame with Lift End Table and Storage Footrest

Wirktive Smart Bed with Massage Recliner Chair - Luxury Bed Frame King Size with Reading Light, USB Port and Speaker, Multifunctional Upholstered Bed Frame with Lift End Table and Storage Footrest

Best Choice Products Set of 2 Adjustable Steel Mesh Zero Gravity Lounge Chair Recliners w/Pillows and Cup Holder Trays - Gray Stripes
Step 8: Reassemble and Test the Recliner
Once you have tightened hardware, checked springs and rails, and addressed any frame issues, it is time to test.
- Carefully lower the recliner back to its normal position.
- Sit in the chair and notice whether the seat feels even from left to right.
- Recline fully, then return to the upright position, paying attention to any remaining lean or shifting.
- If the chair still leans noticeably after all these checks, you may be dealing with a subtle frame twist that requires a replacement part or professional evaluation.
When to Call in Parts or Professional Help
Not every leaning problem can or should be fixed at home.
- If your recliner is still under warranty, contact your dealer or Lazyboy support before doing major structural work.
- If you discover broken welds, badly warped metal, or large cracks in the wood, it is often safer to replace those components instead of trying to bend or glue everything back.
- Use DIY inspection and tightening steps to narrow down the problem, then source the correct components using the tips in finding Lazyboy recliner parts.
- For powered recliners, be extra cautious around wiring and motors and unplug the chair before working underneath it.
Final Thoughts
A Lazyboy recliner that leans to one side is more than just an annoyance — it is a sign that something in the base, springs, or frame needs attention. By going step by step, checking for simple leveling issues first and then working your way through the base, springs, rails, and backrest alignment, you can often bring the chair back to an even, comfortable feel.
With a few basic tools, some careful inspection, and the right replacement hardware from searches like recliner repair kits on Amazon, you can usually fix the lean yourself and add years of life to your favorite Lazyboy recliner.
How to Tighten a Loose Armrest on a Lazyboy Recliner
Armrests on Lazyboy recliners take a lot of stress every time you push off the chair, pull yourself up, or lean to one side. Over time, screws work loose, wooden frame holes can wear or strip out, and metal brackets may start to flex. The result is a wobbly, squeaky, or sagging armrest that feels anything but secure.
Fixing a loose armrest is usually straightforward. In most cases, you just need a few simple tools, a closer look at how the armrest is attached, and a few minutes of tightening or reinforcing the hardware.
Tools and Parts You May Need
Before you start, gather a few basic tools so you can complete the job without stopping.
- Phillips and flathead screwdrivers – a basic precision screwdriver set works well for most recliner screws.
- Hex keys (Allen wrenches) if your model uses socket-head bolts. A compact Allen key set covers most sizes.
- Adjustable wrench or small socket set.
- Flashlight or headlamp to see inside the frame.
- Wood repair supplies if the screw holes are stripped, such as wood filler for furniture repair or wooden repair dowels.
- Replacement hardware, for example a small recliner repair parts kit that includes screws, bolts, and washers.
For a broader overview of common issues and parts you might encounter while working on your chair, it can help to review this guide to common Lazyboy recliners problems, solutions and parts.
Baridwon 2 Set Recliner Replacement Parts, Durable Recliner Release Pull Handle with Recliner Pull Cable, Repair Replacement Parts Compatible with Most Furniture of Recliner Chair Sofa Couch
Baridwon Recliner Replacement Parts with Pull Handle and Release Cable (2-Sets), Repair Recliner Mechanism Parts Compatible with Most Furniture of Recliner Sofa Couch Chair

Baridwon 1 Set Recliner Replacement Parts, Durable Recliner Release Pull Handle with Recliner Pull Cable, Repair Replacement Parts Compatible with Most Furniture of Recliner Chair Sofa Couch
Step 1: Identify How Your Armrest Is Attached
Not every Lazyboy recliner armrest is built the same way. Some are bolted directly to the wooden side frame, while others are secured with metal brackets, rails, or a combination of both.
- Carefully slide the recliner away from the wall and give yourself space to work on both sides.
- Run your hand along the underside and inside of the armrest to feel for screws, bolts, or brackets.
- Use a flashlight to look under the arm, near where it meets the seat and back. Many fasteners are hidden slightly inside the frame, so good lighting makes a big difference.
If you are unsure about the internal layout of your particular model, you might find it helpful to look at diagrams and part breakdowns like those in the Lazyboy recliner parts diagram and manual article.
Step 2: Tighten All Accessible Screws and Bolts
Once you have located the hardware that holds the armrest in place, tightening is usually the quickest fix.
- Use the correct screwdriver or hex key to snug each screw or bolt that connects the armrest to the frame or brackets.
- Tighten a little at a time on each fastener, rather than fully tightening one side first. This helps the armrest pull back into alignment evenly.
- If you see washers that are bent or missing, replace them. A small assorted washer set is handy to have.
- After tightening, gently rock the armrest side to side and front to back. If it feels solid, you may already be done.
If tightening the visible hardware does not fully solve the problem, it likely means there are hidden fasteners inside the frame that also need attention.
Step 3: Access Hidden Armrest Fasteners
On many recliners, some of the armrest screws or bolts are hidden under fabric flaps or stapled dust covers.
- Look underneath the armrest for a fabric panel or dust cover attached with staples or hook-and-loop (Velcro) strips.
- If it is stapled, carefully lift just enough of the fabric to access the frame. A small flathead screwdriver or staple remover can help lift staples without tearing the cloth.
- Once inside, locate additional brackets or support rails that connect the armrest to the side frame.
- Tighten these screws and bolts the same way, checking that the armrest pulls snugly against the frame as you go.
If you notice metal brackets that seem bent or warped, you may need to straighten them gently with a wrench or replace them entirely using compatible pieces from a recliner bracket replacement kit.
Step 4: Repair Stripped or Worn Screw Holes
If the screws just keep spinning or will not tighten no matter how hard you turn, the wood they bite into may be stripped.
- Remove the loose screw and inspect the hole. If it looks oversized or crumbled, it needs reinforcement.
- For a quick fix, you can insert wooden toothpicks or a short piece of wood dowel with a bit of wood glue into the hole, then reinsert the screw after the glue begins to set.
- For a more permanent repair, fill the hole with a suitable epoxy wood repair kit, let it cure fully, and then pre-drill a new pilot hole for the screw.
- When reassembling, consider using a slightly longer screw of the same diameter to reach fresh wood deeper in the frame.
Re-test the armrest after the repair. It should feel noticeably firmer if the screws are now able to bite into solid material.
Step 5: Check the Recliner Mechanism Near the Arm
In some cases, what feels like a loose armrest is actually movement in the nearby reclining mechanism or side frame.
- While the chair is on its side, gently move the arm up and down and watch how the metal mechanism and side rails move with it.
- If you see play where the mechanism attaches to the wooden frame, tighten those bolts as well.
- Apply a small amount of lubricant to any noisy metal joints using a light silicone spray lubricant to reduce squeaks.
If your recliner has other issues such as squeaking, footrest problems, or trouble reclining smoothly, it may be worth reviewing a broader guide like how to repair your Lazyboy recliner while you have the chair opened up.
Step 6: When to Replace the Armrest or Hardware
Sometimes tightening and wood repair are not enough. If the armrest has deep cracks, the internal frame is broken, or the brackets are badly bent, replacement is the safer option.
- Inspect the internal wooden frame of the arm for splits, rot, or severe damage. If the structure itself is compromised, it may need professional repair or a replacement part.
- Check the metal brackets and plates. If they are cracked or kinked, replacing them is more reliable than trying to bend them back.
- You may be able to source compatible parts via a focused search for Lazy Boy recliner replacement parts or by contacting an authorized service center.
- Always match the new hardware to the original size and type so the armrest lines up correctly with the rest of the chair.
For more tips on sourcing parts and deciding whether to repair or replace components, the article on finding Lazyboy recliner parts is a helpful resource.

M Mute Touch 2 Pack Couch Arm Rest Pillow, 6''x6''x20'' Faux Leather Waterproof Cover, High Density Foam Armrest Cushion, Removable & Washable Elbow Support for Sofa, Bed, and Armchair (Medium Grey)

NNSMUN Armrest Cover, Recliner Chair Protector, Furniture Protector Slip, Side Storage Pocket, Stretch Armchair Couch Arm Rest Cover for Recliner, Chair, Sofa (Light Gray,1 Seater(3pcs))

Smiry Memory Foam Office Chair Armrest Pads, Non-Slip Armrest Cushion
Safety and Warranty Considerations
Whenever you work on a Lazyboy recliner, it is important to keep safety and warranty coverage in mind.
- Always unplug power recliners before working near wiring, motors, or control boxes.
- Work on a clean, stable surface and have someone help you turn or support the chair if it is heavy.
- If your recliner is still under the original warranty or a protection plan, check the terms before doing major structural repairs yourself.
- When in doubt, you can use DIY troubleshooting to identify the issue and then decide whether to call a professional, especially for complex mechanical or electrical problems.
Final Thoughts
Tightening a loose armrest on a Lazyboy recliner is usually a simple project that can make your chair feel solid and secure again. By locating all of the fasteners, tightening or replacing any loose hardware, and repairing stripped screw holes, you can often restore the arm in under an hour.
If you take the time to inspect nearby mechanisms and frame connections, you may even catch other developing issues before they turn into bigger repairs. Combine this focused armrest fix with periodic checks described in broader maintenance guides, and your Lazyboy recliner should continue providing comfortable, dependable support for years to come.