
How to Replace a Lazyboy Recliner Tension Spring (DIY Repair)
Lazyboy recliners are built for comfort, which is exactly why they get used so often. A good recliner becomes the favorite seat in the house for watching TV, reading, gaming, relaxing after work, and sometimes even falling asleep. Because of that heavy daily use, some parts naturally wear out over time. One of the most common parts to fail is the spring.
When a Lazyboy recliner spring starts wearing out or breaks completely, the chair may feel uncomfortable, unstable, or too easy to recline. In some cases, the seat may start sagging. In others, the reclining action may no longer feel smooth or supportive. The good news is that a damaged recliner spring does not always mean you have to replace the entire chair. In many cases, you can replace the faulty spring yourself with the right tools, the right replacement part, and a careful step-by-step approach.
This guide will walk you through how to identify the type of spring that has failed, how to tell which one needs replacement, and how to replace it safely.
Understanding the Two Main Recliner Spring Types
Before replacing anything, it is important to know that recliners typically use two different spring types, and each one serves a different purpose. The method of replacement depends on which spring is damaged.
1. Zigzag spring
A zigzag spring is usually located under the seat and is responsible for supporting your weight and helping the seat maintain its shape and firmness. If this spring becomes weak, bent, or broken, the chair may start to sag or feel like it is sinking when you sit down.
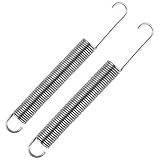
2. Recoil tension spring
A recoil tension spring is usually attached to the reclining mechanism underneath the chair. Its job is to help control the reclining action and provide tension during movement. If this spring wears out, the footrest or reclining action may feel too loose, too easy, or less supportive than normal.
Knowing the difference matters because seat support issues usually point to a zigzag spring problem, while reclining motion issues often point to a recoil tension spring problem.
How to Tell Which Recliner Spring Is Faulty
You do not want to buy replacement parts before identifying the real problem. Here are some signs to help you narrow it down.
Signs the zigzag spring may be damaged
- The seat feels lower than usual
- You feel a sinking sensation when sitting down
- The chair feels uneven or less supportive
- You hear creaking or popping from the seat area
Signs the recoil tension spring may be damaged
- The reclining action feels too loose
- The chair reclines too easily and does not feel stable
- The footrest action feels weak or uneven
- The recliner no longer gives the same resistance as before
If the chair feels uncomfortable mainly when sitting, the zigzag spring is more likely the issue. If the problem happens mainly when opening, closing, or reclining the chair, then the recoil tension spring is more likely to be faulty.
Tools and Supplies You May Need
Before starting the repair, gather everything you need so the job goes more smoothly.
- Adjustable wrench
- Pliers or locking pliers
- Flathead screwdriver
- Work gloves
- Safety goggles
- Replacement zigzag spring or recoil tension spring
- Flashlight for inspecting the underside of the recliner
Safety matters during this repair because springs can still be under tension, even when broken or worn.

kzfuli 3-5/8 Inch Replacement Recliner Chair Mechanism Furniture Tension Springs Long Neck Style ,Long Neck Hook Style-Recliner Replacement Parts-3.46 Inch Inside Hook to Hook (Silver White 2Pcs)

House2Home 31" Sinuous Spring Repair Kit for La-Z-Boy, Recliners & Sofas - Heavy Duty 8-Gauge No-Sag Zig-Zag Springs - Permanent Fix for Sagging Cushions & Broken Furniture Support (4-Pack)

Aocies 5-1/8" Recliner Spring Replacement Stainless Steel Sofa Chair Mechanism Tension Spring Compatible with Ashley, Flexsteel, La-Z-Boy, and Homestretch Recliners 2 PCS
Before You Start
Make sure the recliner is placed on a flat, stable surface with enough room to work around it. If the recliner is a power model, unplug it before turning it over or working on any internal parts. Remove cushions if needed and keep small hardware in a safe place so nothing gets lost during the repair.
Take a few photos of the underside before removing anything. This makes it easier to remember how the old spring was positioned and how the surrounding parts were attached.
How to Replace a Zigzag Spring in a Recliner
If your recliner feels like it sags when you sit down or the seat support feels uneven, the zigzag spring may be damaged. Follow these steps carefully.
Step 1 – Turn the chair over and remove the covering
Carefully flip the recliner over so you can access the underside. Remove the dust cover or fabric covering that hides the frame and internal components. This covering is usually attached with staples, clips, or small fasteners.
Once removed, inspect the springs underneath the seat. Look for springs that are bent, detached, cracked, or stretched out of shape.
Step 2 – Locate the retaining bolts or attachment points
Find the retaining bolts, clips, or mounting points that hold the damaged zigzag spring in place. Use an adjustable wrench or pliers to loosen them. Avoid removing everything too quickly. It is better to loosen each connection carefully before taking the spring out fully.
Step 3 – Remove the broken spring
Once the mounting points are loose, gently pull the top section of the broken zigzag spring free. After that, remove the lower section from its clamp or bracket. Be careful during this step, especially if the spring is warped or still under slight tension.
Step 4 – Compare the damaged spring with a replacement
Before installing a new one, compare the old spring to the replacement. Check the length, width, curve, and hook style. A mismatched spring may not fit correctly and can affect comfort or durability.
If you are shopping for parts, look for zigzag spring for recliner options that match your chair as closely as possible.
Step 5 – Install the new zigzag spring
Attach the upper part of the new spring first, then secure the lower end into its clamp or bracket. Some people find it easier to connect the end with the clearest visibility first. Make sure the spring sits properly and is aligned the same way as the original.
If multiple zigzag springs are worn, it may be worth replacing more than one at the same time so the seat feels balanced and evenly supported.
Step 6 – Reattach the covering and test the chair
Once the new spring is secure, reattach the dust cover or upholstery underneath the recliner. Flip the chair back upright and test it by sitting in it. Pay attention to how the seat feels. A successful repair should restore support and reduce the sagging sensation.
How to Replace a Recoil Tension Spring in a Recliner
If the chair reclines too easily, feels loose, or no longer provides enough resistance, the recoil tension spring may be the faulty part. These springs are connected to the reclining mechanism, so take extra care during removal and installation.
Step 1 – Flip the recliner over and locate the recoil spring
Turn the recliner over and remove the bottom covering if necessary. Locate the recoil tension spring and inspect the area where it is attached. Check whether the spring is broken, stretched, missing, detached, or simply worn out.
Step 2 – Wear gloves and safety goggles before removing the spring
Because recoil springs may still hold tension, safety goggles and gloves are strongly recommended. Use pliers to carefully unhook the damaged recoil spring from each attachment point. Move slowly and keep your hands clear of the spring path.
Step 3 – Buy a compatible replacement spring
Choose a replacement spring that matches the original size and strength as closely as possible. In many cases, a heavy-duty replacement is a smart choice if your recliner gets frequent daily use.
You can browse recliner recoil tension spring options and compare the size, hook style, and spring strength before ordering.
Step 4 – Stretch the spring slightly if needed
Some replacement recoil springs may need slight stretching before installation so they align more easily with the mounting points. Use two screwdrivers or appropriate tools to gently extend the spring just enough for installation. Do not overstretch it. Allow it to rest briefly before fitting it into place.
Step 5 – Install the new recoil spring carefully
Fix the new spring onto the correct attachment points, starting with one end and then securing the other. Locking pliers can help you control the spring more safely during installation. Double-check that the spring is seated correctly and not twisted.
Step 6 – Reassemble and test the recliner
Once the spring is installed, put the covering back in place and return the recliner to its normal position. Sit in the chair and test the reclining action several times. The movement should feel more controlled, supportive, and even.
Zookpr 2Pcs 7 Inch Recliner Springs Replacement Sofa Chair Mechanism Tension Furniture Replacement Parts -Long Neck Hook Style
kzfuli 3-5/8 Inch Replacement Recliner Chair Mechanism Furniture Tension Springs Long Neck Style ,Long Neck Hook Style-Recliner Replacement Parts-3.46 Inch Inside Hook to Hook (Silver White 2Pcs)

XwaYexa 3-5/8" Recliner Springs Replacement, Compatible with Southern Motion & Lazy Boy Recliner, Stainless Steel Tension Springs with Long Neck Hook, Sofa/Chair Mechanism Repair 4-Pack
Common Mistakes to Avoid When Replacing Recliner Springs
Even a simple repair can go wrong if you rush. Here are some of the most common mistakes to avoid:
- Buying the wrong type of spring without checking the original first
- Forgetting to photograph the underside before disassembly
- Removing hardware too quickly without noting where it goes
- Working without goggles or gloves when handling tension springs
- Installing the spring at the wrong angle
- Replacing only one damaged part when nearby springs are also badly worn
Taking your time can make the repair easier and safer.
When You Should Replace More Than One Spring
Sometimes only one spring is clearly broken, but the surrounding springs are already weak. If your recliner is older and heavily used, replacing only a single spring may leave the chair feeling uneven. Inspect the nearby springs for rust, stretching, cracks, or loss of shape.
If several parts look worn, replacing multiple springs at once can save time and help restore comfort more evenly.
How to Know If the Spring Is Not the Only Problem
In some recliners, a failed spring is only part of the issue. If replacing the spring does not fully solve the problem, check for these additional faults:
- Loose bolts in the frame
- Damaged recliner mechanism
- Broken brackets or clamps
- Worn seat padding
- Misaligned reclining linkage
A sagging seat, for example, may be caused by both a weak spring and worn foam padding. A loose reclining action could also involve linkage wear in addition to the recoil spring.
Maintenance Tips to Make Recliner Springs Last Longer
Replacing a spring takes time, so it helps to keep the new one in good condition for as long as possible.
- Avoid dropping heavily into the chair
- Do not force the recliner open or closed
- Inspect the underside occasionally for loose parts or wear
- Tighten loose bolts before they stress nearby components
- Keep the mechanism clean and free from dust buildup
- Address small comfort or movement issues early before they worsen
Simple maintenance can extend the life of your recliner and reduce the chance of future repairs.
Video Guide
If you want a visual reference for the replacement process, this video may help:
Final Thoughts
A broken recliner spring does not mean your favorite chair is finished. Whether the problem is a zigzag spring under the seat or a recoil tension spring in the reclining mechanism, the repair is often manageable with patience and the right replacement parts.
The most important steps are identifying the correct spring type, working safely, and installing a compatible replacement. Once done correctly, your recliner can feel supportive and comfortable again without the cost of replacing the entire chair.
With the steps above, replacing a Lazyboy recliner tension spring should feel much more approachable. Work carefully, pay attention to the spring type, and test everything before regular use. If you need more help diagnosing related issues, read our recliner troubleshooting guide.

ttmagic Universal Heavy-Duty Metal Sofa Chair Recliner Release Pull Handle Replacement Parts, Fits Ashley, Lazy Boy and Most Recliner Brands, 3.5" x 3" Handle Size
$13.99 (as of June 19, 2026 02:10 GMT -05:00 - More infoProduct prices and availability are accurate as of the date/time indicated and are subject to change. Any price and availability information displayed on [relevant Amazon Site(s), as applicable] at the time of purchase will apply to the purchase of this product.)
EDO Metal Recliner Handle Replacement Parts with Cable, Universal Sofa Chair Couch Release Lever Pull Handle, Fits Ashley and Major Recliner Brands Manufacturers, Exposed Cable Length 4.7"
25% Off
ttmagic Sofa Chair Recliner Release Pull Handle 3" by 3.5" Replacement Parts with Cable, Fits Ashley Lazy Boy and Most Recliner Brands Couch Sofa Chair Furniture, Exposed Cable Length 4.9"
28% Off
I need a diagram. I have a broken bolt that retains a spring. Can’t figure how it attaches.
I have a Lazy Boy recliner with both tension springs broken. The ones that were broken would measure approx. 3&5/8 inches long. I have purchased new ones from you, but don’t know either attachment points. Could you send me a diagram as to where the attachment points are?
Thank you