Featured Articles
Lazyboy Leather vs Fabric Recliner: Which Is Better?
Choosing between a Lazyboy leather recliner and a fabric recliner can be surprisingly difficult. Both materials can provide excellent comfort, but they differ significantly in price, appearance, cleaning requirements, durability, temperature, stain resistance, and how they age over time.
A leather recliner can give a room a polished, premium appearance and is generally easier to wipe clean after minor spills. A fabric recliner, on the other hand, normally provides more color, texture, and pattern choices while feeling softer and warmer from the moment you sit down.
Neither material is automatically better for every household. The right choice depends on how you intend to use the chair, who will use it, whether you have children or pets, the climate in your home, your maintenance preferences, and how much you are comfortable spending.
This detailed comparison explains the advantages and disadvantages of Lazyboy leather and fabric recliners so you can choose the upholstery that best suits your home and lifestyle.
Quick Comparison: Lazyboy Leather vs Fabric Recliner
| Feature | Leather Recliner | Fabric Recliner |
|---|---|---|
| Initial cost | Usually more expensive | Usually more affordable |
| Appearance | Premium, smooth and sophisticated | Warm, casual and highly customizable |
| Initial feel | Can feel firmer or cooler at first | Usually soft and comfortable immediately |
| Cleaning | Minor spills are often easier to wipe away | May absorb liquids more quickly |
| Maintenance | Needs appropriate leather care and protection | Needs vacuuming and cleaning according to its care code |
| Pet resistance | Hair is easy to remove, but claws can scratch it | Claws may snag woven fibers and hair may cling |
| Temperature | May feel cool in winter and warm in summer | Usually feels more temperature-neutral |
| Color selection | Usually fewer colors and finishes | Many colors, textures and patterns |
| Aging | Can develop an attractive patina if maintained | May fade, pill or show wear depending on the fabric |
| Best for | Premium appearance and easy surface cleaning | Soft comfort, variety and lower upfront cost |
What Is a Leather Lazyboy Recliner?
A leather Lazyboy recliner uses leather upholstery on some or all of the chair’s seating surfaces and outer panels. However, not every chair described using the word “leather” necessarily uses the same material throughout.
Depending on the model and upholstery selection, you may encounter terms such as:
- Top-grain leather
- Corrected-grain leather
- Split leather
- Leather match
- Bonded leather
- Faux or synthetic leather
These materials can differ in price, durability, texture, breathability, and maintenance requirements. Before buying, confirm exactly what material covers the seat, back, arms, sides, and rear of the recliner.
A chair may use genuine leather on the areas that touch your body while using a matching synthetic material on less visible surfaces. This can lower the price while maintaining the appearance of leather from the front.
What Is a Fabric Lazyboy Recliner?
A fabric Lazyboy recliner uses woven or knitted upholstery rather than leather. Fabric is a broad category that can include many textures, fibers, finishes, and performance levels.
Common options may include:
- Polyester upholstery
- Microfiber
- Chenille
- Velvet-like fabrics
- Textured weaves
- Performance fabrics
- Natural and synthetic fiber blends
Fabric upholstery gives buyers far more freedom in color and texture. It can range from smooth and tightly woven to plush, patterned, or heavily textured.
The durability of a fabric recliner depends greatly on the specific upholstery. A tightly woven performance fabric may withstand daily family use better than a delicate decorative fabric, even though both fall under the same general fabric category. You can also explore the official La-Z-Boy specialty fabric options to learn more about performance, stain-resistant, and pet-friendly upholstery choices.
Leather vs Fabric Recliner Comfort
Comfort is subjective, but the upholstery material affects how the recliner feels against your body.
How leather feels
Leather typically has a smooth surface and may feel slightly firmer when the chair is new. Genuine leather can soften gradually as it is used, allowing the recliner to develop a more broken-in feel.
Some people enjoy the supportive, substantial feel of leather. Others find it less inviting than soft fabric, especially during the first few months of ownership.
Leather can also feel cool when you first sit down in a cold room. In warmer conditions, it may feel hot or slightly sticky against bare skin.
How fabric feels
Fabric usually feels warmer and softer immediately. It does not typically have the same cool initial contact as leather, making it comfortable in bedrooms, family rooms, and colder climates.
The texture varies considerably. A smooth microfiber recliner feels different from a thick chenille recliner, so it is still important to test the exact upholstery rather than assuming all fabric feels the same.
Which material is more comfortable?
Fabric usually wins for immediate softness and temperature-neutral comfort. Leather may be better if you prefer a smooth, supportive surface that gradually softens with use.
The cushion construction, seat depth, back support, and recliner size will normally have a greater effect on overall comfort than the upholstery alone.
Appearance and Interior Style
Leather recliner appearance
Leather often creates a more formal, premium, or traditional appearance. It can work especially well in:
- Executive offices
- Traditional living rooms
- Rustic interiors
- Industrial-style rooms
- Home theaters
- Modern rooms with clean furniture lines
Brown, black, tan, burgundy, cream, and gray are common leather choices. The natural variation in real leather can give each chair a slightly different character.
Fabric recliner appearance
Fabric offers significantly more design flexibility. You can usually choose from a much larger selection of:
- Solid colors
- Neutral shades
- Bold colors
- Patterns
- Textured finishes
- Contrasting threads
Fabric may blend more naturally into a relaxed family room, casual living space, nursery, bedroom, or reading corner.
Which one looks better?
Leather usually looks more premium and structured. Fabric generally looks softer, warmer, and easier to coordinate with a wide range of decorating styles.

ANARACHON Leather Look Recliner Chair Covers, 4-Pieces Stretch Recliner Cover, Soft Reclining Chair Slipcover, Washable Furniture Protector for Lazy Boy Recliner (1 Seater, Brown)

ANARACHON Leather Look Loveseat Recliner Cover, 6-Pieces Stretch Dual Recliner Sofa Covers, Soft Reclining Couch Slipcover, Washable Furniture Protector for Pets (2 Seater, Brown)
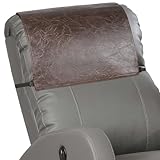
Xmntdo Recliner Headrest Protector,Non Slip Waterproof Headrest Cover,Leather Recliner Headrest Cover for Sofa,Furniture,Living Room,Office Chair 17x27 in(Chocolate Brown)
Price Comparison
Leather recliners generally cost more than comparable fabric models. Genuine leather is more expensive to produce and upholster, and it is often offered as a premium upgrade.
Fabric is usually the more affordable choice, although premium performance fabrics can also be expensive.
When comparing prices, make sure the chairs have similar features. A basic manual fabric recliner and a power leather recliner with an adjustable headrest are not direct comparisons. Consider:
- Manual or power operation
- Power headrest and lumbar features
- Rocking, swiveling, or wall-reclining functions
- Chair size
- Cushion upgrades
- Warranty coverage
- Exact upholstery grade
Which offers better value?
Fabric usually provides better upfront value. Leather may provide better long-term value if you appreciate its appearance, maintain it properly, and plan to keep the chair for many years.
Durability and Expected Lifespan
The answer depends on the quality of the specific leather or fabric.
Leather durability
High-quality leather can be very durable. It does not usually pill like fabric, and small crumbs or pet hair are less likely to become trapped in the surface.
However, leather has its own vulnerabilities. It can:
- Scratch from pet claws
- Crack if it becomes excessively dry
- Fade in direct sunlight
- Absorb body oils over time
- Peel if the material is bonded or synthetic
- Become damaged by harsh household cleaners
Properly maintained genuine leather can age attractively. Lower-quality coated or bonded materials may deteriorate very differently and can peel rather than develop a natural patina.
Fabric durability
Fabric does not normally show scratches in the same way leather does, but woven material can snag, pill, fade, or become worn in high-contact areas.
The arms, headrest, and front of the seat usually experience the most wear. Tightly woven fabric tends to resist snagging better than loose or highly textured upholstery.
Performance fabric may be a strong option for homes where the chair will receive heavy daily use.
Which lasts longer?
High-quality genuine leather can outlast many standard fabrics when maintained correctly. However, a durable performance fabric may outlast low-grade bonded or synthetic leather.
Material quality matters more than the broad leather-versus-fabric label.
Cleaning and Everyday Maintenance
Cleaning a leather recliner
Leather is often easier to clean after a small surface spill because liquid may remain on top briefly instead of immediately soaking in. Blot spills promptly using a clean, absorbent cloth.
Routine care may include:
- Dusting with a soft cloth
- Vacuuming seams and crevices
- Blotting spills instead of rubbing
- Using only products appropriate for the specific leather finish
- Keeping the chair away from strong heat and direct sunlight
Avoid using an untested household cleaner, alcohol, bleach, furniture polish, or excessive water. The wrong product can remove the protective finish or cause discoloration.
You can compare products sold as leather recliner cleaner and conditioner, but always verify that a product is appropriate for your chair’s exact leather type before applying it.
Cleaning a fabric recliner
Fabric usually needs regular vacuuming because dust, crumbs, and pet hair can settle into the weave.
Before spot cleaning, find the upholstery cleaning code on the chair’s tag. Common codes include:
- W: Use a water-based upholstery cleaner
- S: Use an appropriate solvent-based cleaner
- W/S: Either approved water-based or solvent-based methods may be allowed
- X: Vacuuming or professional cleaning only
Never assume water is safe simply because the upholstery looks like ordinary fabric. Using the wrong cleaner may create rings, discoloration, shrinkage, or permanent texture changes.
Depending on the cleaning code, you may find an upholstery fabric cleaner for recliners useful for compatible materials.
For more specific cleaning instructions, read the site’s Lazyboy fabric and leather care guide. You should also review the official La-Z-Boy fabric and leather care instructions before applying any cleaner, conditioner, stain treatment, or other product to your recliner.
Stain and Spill Resistance
Leather and spills
Leather is generally easier to wipe after an immediate spill, but it is not stain-proof. Liquids can eventually penetrate seams, scratches, and unprotected areas. Oils, ink, denim dye, and body products may also discolor the surface.
Fast action still matters. Blot the spill gently rather than scrubbing it across the leather.
Fabric and spills
Standard fabric may absorb liquids quickly. Performance fabrics often provide better stain resistance, but they still need prompt cleaning.
Fabric can be harder to restore after deeply absorbed spills, especially if the liquid reaches the cushion foam beneath the upholstery.
Best choice for frequent spills
Leather or a stain-resistant performance fabric may be the better choice. A fitted waterproof recliner cover can provide additional protection for either upholstery type.
Leather vs Fabric for Homes With Pets
Neither option is completely pet-proof.
Leather with pets
Advantages include:
- Pet hair is usually easy to wipe or vacuum away
- Odors may be less likely to become trapped in the surface
- Muddy paw marks may be easier to clean promptly
Disadvantages include:
- Claws can leave visible scratches
- Punctures may be difficult to disguise
- Repeated scratching can damage the finish
Fabric with pets
Advantages include:
- Minor claw marks may be less visible on some textured fabrics
- The surface may provide better traction for pets jumping up or down
- Some performance fabrics are designed for demanding households
Disadvantages include:
- Hair can become embedded in the weave
- Claws may snag loose threads
- Odors and liquids can penetrate the material
Best choice for pet owners
For pets that shed heavily but do not scratch furniture, leather can be convenient. For pets with sharp claws, a tightly woven performance fabric may be less risky.
A pet recliner cover can help protect either material.
Leather vs Fabric for Families With Children
Leather is convenient when spills are cleaned immediately, and crumbs can normally be removed from the smooth surface easily. However, marker, pen, sharp toys, and rough play can cause difficult damage.
Fabric may be softer and more comfortable for family use, but ordinary upholstery can absorb juice, milk, food, and other messes.
For households with young children, consider:
- A dark or medium upholstery color
- A stain-resistant performance fabric
- A protected leather finish
- A removable recliner cover
- Clear rules about food, pens, and sharp toys
The safest choice may be the material you are realistically willing to clean and maintain.
Temperature and Climate
Leather reacts more noticeably to room temperature. It can feel cool during winter and warmer during hot weather, particularly if exposed to sunlight.
Fabric tends to remain more consistent and may feel more comfortable against bare skin in both hot and cold conditions. However, thick plush fabric may retain more warmth during long sitting sessions.
Best for a hot climate
A breathable fabric may feel more comfortable, especially if the room receives strong sunlight or is not consistently air-conditioned.
Best for a cold climate
Fabric usually feels warmer immediately. Leather can still work well in a temperature-controlled room or when paired with a throw blanket.
Allergies, Dust and Pet Dander
Leather’s smooth surface may be easier to wipe clean, making it appealing to people who want to reduce dust and pet hair buildup on the upholstery.
Fabric can trap more dust, pollen, pet dander, and crumbs within its fibers. Regular vacuuming with an upholstery attachment becomes especially important.
However, allergens can still accumulate in seams, beneath cushions, and inside the chair regardless of the upholstery type.
A handheld vacuum for furniture or a vacuum with an upholstery attachment can be useful for maintaining either chair.
Odor Resistance
Fabric can absorb household odors, smoke, pet smells, food, and body oils more readily than a smooth protected leather surface.
Leather may resist some odors better, but it can still absorb oils and odors over time. Incorrect cleaning products may also leave a noticeable chemical smell.
For a smoke-free home with routine cleaning, either material can remain fresh. In homes with pets, frequent eating in the recliner, or heavy daily use, leather may be easier to deodorize at the surface level.
Fading From Sunlight
Both leather and fabric can fade when exposed to direct sunlight.
Leather may dry, fade, or crack when left near a sunny window or heat source. Fabric may lose color unevenly, particularly on the side facing the window.
To reduce fading:
- Keep the recliner away from intense direct sunlight
- Use blinds or curtains during peak sunlight
- Rotate movable chairs occasionally if practical
- Avoid placing the recliner directly beside a radiator or heater
- Use an appropriate cover when the chair is not in use
Scratches, Pilling and Surface Wear
Leather surface wear
Genuine leather may develop creases and a patina as it ages. Some owners consider this attractive. Scratches can sometimes blend into the natural appearance, but deeper damage may require professional repair.
Synthetic or bonded leather may peel or flake, which is a different form of wear and generally harder to hide.
You can browse a leather furniture repair kit for minor damage, but color matching and surface preparation are important.
Fabric surface wear
Fabric may pill where repeated friction occurs, particularly on the seat, headrest, and arms. Loose weaves can also snag.
A fabric shaver for upholstery may help with surface pilling on compatible fabrics, but it should be tested carefully to avoid cutting or weakening the material.
Repairability
Leather scratches, small punctures, and minor color loss may sometimes be repaired using filler, dye, or a matching patch. Professional repair is often the best option for expensive leather upholstery.
Fabric tears may be stitched, patched, or repaired from beneath, but an exact color and pattern match can be difficult. Pilling and worn fibers cannot always be restored completely.
If the damage is large, reupholstery may be required regardless of the original material.
Does Leather Require More Maintenance?
Leather does not necessarily require more frequent maintenance, but it requires more specialized care.
Fabric normally needs regular vacuuming and occasional spot cleaning according to its care code. Leather needs gentle dust removal, immediate spill cleanup, protection from sunlight and heat, and only compatible cleaning products.
The wrong leather product can cause more serious damage than neglecting a small amount of dust. That is why it is important to identify the exact leather finish before cleaning or conditioning.
For a broader routine, see the site’s guide on how to clean a Lazyboy recliner.

CAR GUYS Interior Car Cleaner for Tough Stains | Stain Remover for Car Seats, Carpet, Upholstery, & Leather | 18 Oz Kit with Microfiber Towel

Chemical Guys, Citrus Fabric & Carpet Cleaner, Ready-to-Use Spray, 16 oz

ForceField® Fabric Cleaner Professional Strength, Deeply Penetrates Water Safe Fabric & Fibers of Upholstery, Clothing, Rugs & Carpeting - 22oz
Color and Customization Choices
Fabric is the clear winner for customization. It generally comes in more:
- Colors
- Patterns
- Textures
- Weave styles
- Design combinations
Leather normally has a smaller selection, but the available colors often complement traditional and modern interiors well.
Choose a color based on more than personal taste. Consider how it will show:
- Pet hair
- Dust
- Crumbs
- Denim dye
- Sun fading
- Surface scratches
Very dark and very light upholstery can both reveal certain types of dirt more easily than medium neutral shades.
Leather vs Fabric for a Power Recliner
The upholstery does not normally change how the motor operates, but it may affect the way the chair feels while moving.
Leather surfaces can create subtle rubbing or creaking noises as upholstered sections move against each other. Fabric is generally quieter where surfaces touch, although the mechanism itself can still make normal operating sounds.
Power recliners often receive more frequent position adjustments, so high-contact areas may experience repeated friction. Whichever material you choose, inspect seams and moving upholstery sections periodically.
Leather vs Fabric for a Manual Recliner
A manual recliner requires more body movement to open, recline, and close. Over time, this can increase friction on the seat, arms, and back.
Leather may show creasing where the body repeatedly bends the surface. Fabric may show pilling or flattening in those same areas.
Durable upholstery and correct chair sizing matter more than whether the material is leather or fabric.
Which Material Is Better for Heavy Daily Use?
For heavy daily use, choose based on material grade rather than category alone.
Good options may include:
- High-quality protected leather
- Durable top-grain leather
- Tightly woven performance fabric
- Commercial-grade or high-abrasion upholstery
Avoid assuming that every leather chair is more durable than every fabric chair. Low-quality bonded leather may deteriorate before a strong performance fabric.
Ask about the specific material, warranty, cleaning code, and recommended use before buying.
Which Material Is Better for Seniors?
Fabric may provide slightly more grip, which can help prevent sliding when sitting down or standing up. It also normally feels warmer and softer.
Leather is easier to wipe after spills and may be easier to keep free of dust and crumbs. However, a very smooth leather seat can feel slippery to some users.
For seniors, these factors may matter more than upholstery type:
- Seat height
- Seat firmness
- Arm support
- Ease of standing
- Power or lift functionality
- Correct chair size
Which Material Is Better for a Home Theater?
Leather is popular for home theaters because it creates a polished appearance and makes crumbs easier to remove. It also pairs well with powered seating and cupholder-equipped recliners.
Fabric can be more comfortable during long viewing sessions because it tends to feel less sticky and may absorb sound slightly better within the room.
Choose leather for the classic premium theater appearance. Choose fabric for soft, cozy, temperature-neutral comfort.
Should You Use a Recliner Cover?
A cover can help protect either upholstery type from:
- Pet hair
- Food spills
- Body oils
- Dust
- Daily friction
- Sunlight
However, choose a cover designed for reclining furniture. A poorly fitted cover may shift, bunch around the mechanism, block controls, or interfere with the footrest.
You can compare a non-slip recliner cover and check its size, control openings, and compatibility with manual or powered chairs.
Questions to Ask Before Choosing
Before deciding between leather and fabric, ask yourself:
- Will children or pets use the chair?
- How often will someone sit in it?
- Will food and drinks be allowed?
- Does the room receive direct sunlight?
- Do I prefer a soft or smooth surface?
- Do I want a formal or casual appearance?
- Am I willing to follow specialized leather-care instructions?
- Does anyone in the home have allergies?
- How long do I expect to keep the recliner?
- What exact leather or fabric grade am I considering?
Your answers will usually make the better option much clearer.
Who Should Choose a Leather Lazyboy Recliner?
Leather may be the better choice if:
- You prefer a premium, structured appearance
- You want pet hair and crumbs to be easier to remove
- You frequently deal with small surface spills
- You are willing to use appropriate leather-care products
- You want upholstery that can develop character with age
- You do not have pets likely to scratch the chair
- Your budget allows for the higher initial cost
Who Should Choose a Fabric Lazyboy Recliner?
Fabric may be the better choice if:
- You want a softer and warmer sitting surface
- You prefer a wider selection of colors and textures
- You want to spend less upfront
- You live in a hot or cold climate where leather temperature is a concern
- You prefer a casual, cozy appearance
- You want access to performance-fabric options
- You do not mind regular vacuuming
Frequently Asked Questions
Is a leather Lazyboy recliner more durable than fabric?
High-quality genuine leather can be extremely durable, but it is not always more durable than fabric. A strong performance fabric may outlast bonded or low-quality synthetic leather. Compare the exact upholstery grade rather than relying only on the material category.
Does leather crack over time?
Leather can crack if it dries out, receives excessive heat or sunlight, or is cleaned with inappropriate products. Correct placement and care can reduce the risk.
Does fabric upholstery pill?
Some fabrics can pill due to repeated friction. The amount of pilling depends on fiber type, weave, upholstery quality, clothing friction, and frequency of use.
Which material is easier to clean?
Leather is usually easier for quick surface wiping. Fabric may require more vacuuming and care-code-specific stain treatment. Neither material should be cleaned without checking the manufacturer’s instructions.
Which is better for dog hair?
Leather generally makes loose dog hair easier to wipe or vacuum away. Fabric may trap hair in its weave, especially if it is textured.
Which is better if my dog scratches furniture?
A tightly woven performance fabric may be safer than leather for a pet that scratches. Claws can leave permanent marks or punctures in leather.
Is leather too hot in summer?
Leather can feel warmer or stickier against bare skin, especially in direct sunlight or a non-air-conditioned room. Fabric tends to feel more temperature-neutral.
Is fabric better for cold weather?
Fabric usually feels warmer immediately when you sit down. Leather may feel cold at first but gradually warms from body heat.
Can I use ordinary household cleaner on leather?
No. General-purpose sprays, alcohol, bleach, furniture polish, and unapproved soap may damage the finish. Use only a product suitable for your specific leather type.
Can I steam-clean a fabric recliner?
Only if the upholstery manufacturer and cleaning code permit it. Excessive moisture or heat can discolor, shrink, or damage certain fabrics and the materials beneath them.
Do leather recliners have a stronger smell?
New genuine leather may have a noticeable natural scent. Synthetic materials may also release a temporary manufacturing odor. Proper ventilation usually helps, but persistent or unusual odors should be discussed with the retailer.
Can leather upholstery be repaired?
Small scratches, color loss, or minor punctures may be repairable, but achieving a convincing color and texture match can be difficult. Expensive leather is often best handled by a professional.
Can a fabric Lazyboy recliner be reupholstered?
Yes, but complete reupholstery can be labor-intensive and expensive. Compare the repair estimate with the cost and condition of the entire chair before proceeding.
Does leather increase resale value?
A genuine leather recliner in excellent condition may attract more interest than a comparable fabric chair, but model age, cleanliness, functionality, and visible wear also have a major effect on resale value.
Which is better for allergies?
Leather may be easier to wipe free of dust and pet dander. Fabric can trap more particles within its fibers and requires consistent vacuuming. Allergens can still collect in seams and beneath cushions on either chair.
Final Verdict: Lazyboy Leather or Fabric Recliner?
A Lazyboy leather recliner is usually the better choice for buyers who want a premium appearance, smooth upholstery, easier surface cleaning, and less trapped pet hair. It can last for many years when the material is high quality and maintained correctly. Its main disadvantages are the higher price, sensitivity to scratches, and tendency to feel warmer or cooler depending on the room.
A Lazyboy fabric recliner is usually the better choice for buyers who prioritize immediate softness, temperature-neutral comfort, broader color selection, and a lower initial cost. Its main disadvantages are that it may absorb spills, trap pet hair, pill, or require more frequent vacuuming.
For homes with children and spills, protected leather or performance fabric may be the most practical. For homes with scratching pets, tightly woven fabric may be safer. For a premium office or home theater, leather may provide the appearance you want. For a cozy family room or reading corner, fabric may feel more inviting.
Ultimately, the quality of the specific material matters more than the broad label. A well-made performance fabric may be a better investment than low-quality bonded leather, while premium genuine leather may outlast ordinary fabric by many years.
Before buying, test the exact chair, confirm the upholstery type, review its cleaning instructions, consider your household’s daily habits, and choose the material you will realistically maintain. That will give you a better result than choosing leather or fabric based on appearance alone.
Lazyboy Power or Manual Recliner? Full Comparison
Choosing between a Lazyboy power recliner and a manual recliner is one of the biggest decisions you will make before buying a new chair. At first glance, both options may look similar. They can share the same general shape, plush cushioning, supportive back, and relaxing reclined position. But the way they function in everyday use can feel very different.
For some people, a manual recliner is the perfect choice because it is simple, reliable, and often more affordable. For others, a power recliner is worth the extra cost because it offers easier adjustment, better precision, and added convenience. The best option depends on your budget, body needs, comfort preferences, room setup, and how you actually use your recliner every day.
This guide breaks down the full comparison between Lazyboy power and manual recliners so you can decide which one is better for your home. We will cover comfort, ease of use, durability, repairs, price, features, room planning, maintenance, and who each type is best for.
What Is a Manual Lazyboy Recliner?
A manual Lazyboy recliner is operated by body pressure, a side handle, or a pull lever depending on the model. To recline, you usually pull the handle or release mechanism and lean back using your own body weight. To close the footrest, you generally push it back down with your legs and body movement.
Manual recliners are popular because they are straightforward and do not require electricity. They are often chosen by buyers who want a classic recliner feel with fewer electronic components.
If you are new to the category, it may help to also read about the broader benefits of Lazyboy recliner ownership before narrowing down the power versus manual decision.
What Is a Power Lazyboy Recliner?
A power Lazyboy recliner uses an electric motor to move the chair into different positions. Instead of pushing back manually, you use built-in buttons or controls to raise the footrest, recline the back, and sometimes adjust the headrest or lumbar support depending on the model.
Power recliners are designed for ease, convenience, and more precise positioning. Many users like them because they can stop the recliner at many different angles instead of being limited to a more basic manual range.
Some power recliners also include added features such as USB charging, power headrests, power lumbar adjustment, or lift assistance on certain mobility-focused models.
Quick Summary: Power vs Manual Lazyboy Recliner
| Feature | Power Recliner | Manual Recliner |
|---|---|---|
| Operation | Motorized buttons or controls | Handle, lever, or body pressure |
| Ease of use | Very easy, especially for limited mobility | Simple, but needs physical effort |
| Position control | More precise reclining angles | More limited position control |
| Needs electricity | Yes | No |
| Price | Usually higher | Usually lower |
| Repairs | Can involve motors, switches, transformers | Often simpler mechanical repairs |
| Best for | Convenience, comfort control, mobility needs | Simplicity, budget, traditional use |
Comfort Comparison
Power recliner comfort advantages
A power recliner usually gives you more control over your comfort because you can stop the chair at many points instead of being limited to a few basic positions. This can make a big difference if you like fine adjustments while reading, watching TV, or resting. Some people do not want to be fully upright or fully reclined. A power recliner gives more in-between positions.
Higher-end models may also include power headrests and power lumbar support, which can improve neck and lower-back comfort significantly.
Manual recliner comfort advantages
A manual recliner can still be extremely comfortable. In fact, many people love the simpler, more natural reclining motion of a manual chair. If the chair fits your body well, comfort can be excellent even without power features.
Manual recliners also appeal to people who prefer a traditional recliner feel and do not care about tiny position adjustments.
Which is more comfortable overall?
If your idea of comfort includes customizable positioning, power usually wins. If your idea of comfort is more about cushions, seat fit, and simple relaxation, a manual recliner may feel just as good.
Ease of Use Comparison
This is one of the biggest differences between the two.
A power recliner is much easier to use for people with arthritis, joint pain, back issues, reduced strength, or mobility limitations. With the press of a button, the footrest rises and the chair reclines gradually. You do not need to yank a handle or push back with your body.
A manual recliner requires more effort. Some are smooth and easy to use, but others may feel stiff depending on the model, the user’s size, and the chair’s condition. For healthy users, that may not be a problem. For older adults or anyone with limited strength, it can matter a lot.
If you are comparing accessibility or maintenance concerns, it may also help to read the site’s guide on common Lazyboy recliners problems, solutions and parts list to understand the kinds of issues owners typically run into over time.

Power Recliner Power Supply, Sopito 2-Pin AC/DC Adapter 100-240V 50/60hz

Power Recliner Power Supply, AC/DC Switching Power Supply Transformer 2-pin 29V/24V 2A Adapter with AC Power Cord for Electric Power Recliner Lift Chair

Universal Electric Couch Power Recliner Adapter 29V 2A Power
Price Comparison
In general, manual Lazyboy recliners are more affordable than power models. That price difference comes from the extra motorized components, electronics, wiring, and convenience features included in a power recliner.
If you are shopping on a tighter budget, manual often gives you better value upfront. You can still get Lazyboy comfort and style without paying for powered features you may not need.
If you are comfortable spending more for convenience, easier operation, and extra comfort adjustments, a power recliner may justify the higher cost.
Durability and Long-Term Reliability
Manual recliner durability
Manual recliners are often viewed as simpler and therefore less likely to have electrical failures. That does not mean they never break, but they usually rely on mechanical parts such as handles, cables, springs, and linkages.
Because there are fewer electronic components, some buyers see manual recliners as the safer choice for long-term simplicity.
Power recliner durability
Power recliners can also last a long time, but they introduce more parts that can eventually fail, including motors, transformers, control boxes, switches, and connectors. That does not automatically make them unreliable. It just means there are more possible failure points over the life of the chair.
If you want to understand common repair items, browsing a recliner power switch or a recliner power supply transformer can help you see the kinds of components power chairs may eventually need.
Repair and Maintenance Comparison
Manual recliner repairs
Manual recliner repairs are often more straightforward. Common issues include broken handles, snapped release cables, worn tension springs, or footrest mechanism problems. Many of these repairs are simple enough for handy owners to attempt at home.
Typical items people compare include a recliner handle replacement, a recliner replacement cable, or a recliner tension spring when troubleshooting a manual chair.
Power recliner repairs
Power recliner repairs can be easy in some cases, but they can also be more technical. A problem might involve a faulty switch, loose power connection, bad transformer, damaged motor, or hand control failure.
Sometimes the fix is simple. Other times it requires more careful diagnosis than a manual recliner would.
Which one is easier to maintain?
Manual recliners usually win for simplicity. Power recliners win for convenience, but not usually for ease of repair.
Power Outage and Outlet Considerations
A manual recliner works whether or not the electricity is on. That may not sound like a big factor at first, but some buyers like knowing their chair is fully usable at all times without depending on an outlet.
A power recliner needs electricity. You will need a nearby outlet, and the chair’s placement may be affected by cord routing. During a power outage, some power recliners may remain in their current position unless they include a battery backup system.
If you want cable management around a powered chair, it can help to browse cord cover for floor solutions or a surge protector power strip for safer power setup.
Room Placement and Space Planning
Both manual and power recliners need room, but the way they operate can affect placement.
Some manual recliners need body momentum and more natural movement when reclining. Some power recliners move more gradually and precisely, which can feel easier in tighter layouts. Still, what matters most is the actual clearance measurement for the specific model.
If you are trying to choose the right chair for your room, a tape measure is essential, and some buyers also compare wall hugger recliner options when space is limited.
Who Should Choose a Power Lazyboy Recliner?
A power recliner is often the better choice if:
- You want easy, button-based operation
- You have arthritis, back pain, or limited mobility
- You want more precise reclining positions
- You like premium features such as USB charging, headrest control, or lumbar adjustment
- You do not mind paying more for added convenience
Power recliners are especially appealing if comfort customization matters more to you than mechanical simplicity.
Who Should Choose a Manual Lazyboy Recliner?
A manual recliner is often the better choice if:
- You want a lower purchase price
- You prefer a simpler chair with fewer electronic components
- You do not mind using a handle or body pressure to recline
- You want something easier to troubleshoot mechanically
- You do not want to depend on a nearby power outlet
Manual recliners are often the better fit for buyers who value simplicity, lower cost, and traditional operation.

ttmagic Metal Recliner Handle Replacement Parts with Cable, Universal Recliner Sofa Chair Couch Release Lever Pull Handle, Fits Ashley and Major Recliner Brands, Exposed Cable Length 4.9“
2 Pieces Recliner Release Cable Replacement D-Ring Pull Handle, Exposed Length 4.75" with S Tip

Baridwon 2 Set Recliner Replacement Parts, Durable Recliner Release Pull Handle with Recliner Pull Cable, Repair Replacement Parts Compatible with Most Furniture of Recliner Chair Sofa Couch
Power vs Manual Recliner for Seniors
For many seniors, power recliners have a clear advantage because they require less effort to operate. Pressing a button is easier than forcing a chair backward or closing a footrest with leg pressure. If standing up and sitting down are becoming more difficult, a powered option may be more comfortable overall.
That said, some seniors still prefer manual recliners because they are familiar, simple, and do not rely on electricity. The better choice depends on the person’s strength, mobility, and preferences.
Power vs Manual Recliner for Families With Kids or Heavy Daily Use
If the chair will be used constantly by multiple people, manual recliners can be appealing because they are simple and less complicated electronically. But they may also experience more wear on handles, cables, and release parts if used roughly.
Power recliners can feel smoother in daily use, but the controls should be treated carefully and the chair needs power access. Families should think about how the chair will realistically be used, not just how it feels in the showroom.
Which One Feels More Premium?
Power recliners usually feel more premium because of the smoother motion, added controls, and convenience features. They often feel more modern and more customizable.
Manual recliners can still feel luxurious in terms of cushioning, upholstery, and support, but their operation feels more traditional than high-tech.
Final Verdict: Is Lazyboy Power or Manual Better?
Neither option is automatically better for everyone.
A Lazyboy power recliner is usually better if you want convenience, easier operation, more precise comfort adjustment, and premium features. A Lazyboy manual recliner is usually better if you want a lower price, simpler ownership, no power dependence, and easier mechanical troubleshooting.
If comfort control and ease of use are your top priorities, power is often worth it. If simplicity and value matter more, manual is often the smarter buy.
The best way to choose is to think about how you actually relax at home. Do you want to press a button and fine-tune the position exactly? Or do you prefer a straightforward recliner with fewer parts and a lower price tag? Once you answer that honestly, the better choice becomes much clearer.
If you are still comparing repair and maintenance concerns, it can also help to look at common items like a recliner handle replacement, recliner replacement cable, recliner power switch, and recliner power supply transformer so you understand the common parts involved with each type.
How to Replace a Lazyboy Seat Cushion
Lazyboy is perhaps one of the comfiest armchairs out there, and it is no surprise that so many people love them. With their plush cushions, supportive design, and soft seating feel, Lazyboy chairs are made for everyday comfort. Whether you are watching TV, reading a book, relaxing after work, or playing your favorite video games, a good Lazyboy armchair can easily become the most used seat in the house.
However, with regular use over time, the Lazyboy seat cushion can start to wear out. The cushion may flatten, sag, lose support, or simply stop feeling as comfortable as it once did. When that happens, the chair may still be in good condition overall, but the seating comfort can drop noticeably. The good news is that replacing a Lazyboy seat cushion is usually not a complicated process. In many cases, it can be done fairly quickly at home, as long as you make sure you get the right replacement cushion for your specific Lazyboy model.
Before starting, it is also a good idea to inspect the cushion carefully and confirm whether the problem is really the cushion itself or if related parts such as the foam, support springs, or seat foundation may also be worn. If the chair is older, you may also want to compare related items like recliner seat cushion replacement, upholstery foam for cushions, or even a recliner repair kit if you suspect more than one part may need attention.
Here are six steps that will help you easily replace a Lazyboy seat cushion in no time:
Step 1
First of all, you have to find the information tag on your Lazyboy. This is one of the most important parts of the process because the information tag helps identify the exact chair model and the parts associated with it. Sometimes the replacement of the cushion may be under a Lazyboy warranty cover, so make sure you check it carefully before taking any further steps. If your chair is still under warranty, you may be able to get the cushion replaced at a lower cost or even at no cost depending on the terms.
It is also smart to take a clear photo of the tag and write down the model information before contacting anyone. That can save time later when ordering parts or asking about compatibility.
Step 2
Once you have the information tag, contact the Lazyboy warranty department or the dealer where the chair was purchased and let them know the details shown on the tag. They should be able to tell you whether your cushion replacement is covered under warranty and what your next steps should be.
If the cushion is covered, you may be able to order a new one directly through the appropriate channel. If it is not covered, then you will need to purchase a replacement cushion yourself. In either case, it is best to make sure the replacement is an original Lazyboy cushion or a properly matched replacement designed for your exact chair. This helps reduce the chances of sizing issues, poor fit, uneven appearance, or comfort problems once the new cushion is installed.
If you are comparing alternatives or looking for comfort-related accessories while waiting for the replacement, you may also want to browse chair seat cushion options or lumbar support pillow for recliner use for temporary comfort improvement.
Step 3
Once you get your new cushion, check the information tag and compare it carefully with the replacement cushion so you can correctly match the cushion to your armchair. Do not skip this step. Even if the cushion looks similar at first glance, small differences in size, thickness, attachment style, or shape can affect how well it fits and how comfortable the chair feels after installation.
Before removing anything, gather the tools you may need and inspect how the original cushion is attached. Depending on the chair design, you may need a screwdriver and some patience to remove parts carefully without damaging clips, brackets, or upholstery. If you want to make the job easier, it can help to have a screwdriver set, a flashlight for home repair, and work gloves nearby.
Step 4
It is time to remove the worn-out cushion. Take it out of the armchair carefully and avoid forcing any part loose too quickly. Use a screwdriver if needed, and make sure you remove each part carefully without breaking anything. If the old cushion is attached tightly, check for hidden fasteners, clips, or locking points before pulling harder.
Once the old cushion has been removed, clean the area underneath before installing the new one. Dust, loose fabric debris, or old foam particles can build up over time and affect how the new cushion sits. This is also a good time to inspect the chair frame and support area underneath the cushion. If the base support looks worn, you may want to check related items such as recliner springs or upholstery webbing if the seat foundation seems weak.
After cleaning and inspecting, slide the new cushion into place carefully. Make sure it sits evenly and aligns with the frame and surrounding upholstery.
Step 5
If your Lazyboy model includes a back cushion that also needs removal or adjustment during the process, find the cushion’s release levers on each side at the back of the recliner. Push the levers upward so they release the back cushion. Then remove the cushion carefully and set it aside safely.
This step is important because on many recliner models, the rear cushion or chair back may need to be loosened or removed to allow proper access and alignment when replacing the seat cushion. Be gentle and avoid twisting the back cushion or forcing it out at an angle.
Step 6
The final step requires you to reinstall or replace the back cushion if it was removed. Lift the back cushion into position and push it down carefully until you hear the release levers click into place. That click tells you the cushion is properly locked in.
Once everything is back in position, test the chair before regular use. Sit down, shift your weight slightly, and make sure the new cushion feels stable, even, and properly fitted. If the cushion feels loose, uneven, or too tight, check the fit again before assuming the installation is complete.
If the step by step instructions above are not clear enough, here is a video showing how to replace a seat cushion:
Replacing a cushion in your favorite Lazyboy armchair is usually a fairly easy process and something many owners can do at home by themselves, without spending extra money taking your Lazyboy to a local repair store. The most important things are choosing the right replacement cushion, checking the chair’s information tag carefully, and handling each part gently during removal and installation.
Frequently Asked Questions
How do I know if my Lazyboy seat cushion needs replacement?
If your seat cushion feels flat, saggy, uneven, lumpy, or no longer gives you the same comfort and support it used to, it may be time for a replacement. In some cases, the fabric still looks fine but the inner foam has already worn down.
Can I replace just the seat cushion and not the whole chair?
Yes, in many cases you can replace just the seat cushion. If the rest of the chair is still in good condition, replacing the cushion can restore comfort without the cost of replacing the entire Lazyboy.
Should I buy an original Lazyboy cushion or an aftermarket replacement?
An original Lazyboy cushion is usually the safest choice because it is more likely to match the size, shape, and support of your chair correctly. An aftermarket replacement may work, but you should compare measurements carefully before buying.
Can I replace the foam inside the cushion instead of replacing the whole cushion?
Sometimes yes. If the cushion cover is still in good condition, some owners choose to replace only the foam insert. In that case, comparing upholstery foam for cushions may be useful, but you still need to match the thickness and density correctly.
What tools do I need to replace a Lazyboy seat cushion?
The exact tools depend on the chair model, but a screwdriver, flashlight, and gloves are often enough for simple cushion replacement. Some models may require a little more care if clips or release levers are involved.
Can a worn seat cushion mean there is another problem underneath?
Yes. Sometimes the cushion is not the only worn part. Recliner springs, webbing, support boards, or the seat base underneath may also be worn. That is why it is smart to inspect the chair once the old cushion is removed.
Is replacing a Lazyboy seat cushion difficult?
Usually no. For many people, it is a manageable home repair as long as they have the correct replacement cushion and follow the steps carefully. The key is to avoid forcing parts and to make sure the replacement matches the chair properly.
How long does it take to replace a Lazyboy seat cushion?
If the correct replacement cushion is already on hand, the process can often be done fairly quickly. For many chairs, it may only take a short amount of time, especially if there are no stuck parts or hidden fasteners.
Can I use a temporary cushion while waiting for the replacement?
Yes. While waiting, some people use a chair seat cushion or a lumbar support pillow for recliner use to improve comfort temporarily.
What should I do if the new cushion does not fit correctly?
Stop and compare the information tag, measurements, and attachment style again before forcing it into place. A poor fit may mean the replacement is not correct for your exact model. In that case, contact the seller or Lazyboy support before continuing.
Summary
If you follow the steps above carefully, your chair can feel comfortable and supportive again without a full replacement. And if you still have questions, you can always contact the Lazyboy department for more information, especially if you are unsure about warranty coverage, model compatibility, or whether your chair may need more than just a new cushion.
How to Adjust Lazyboy Recliner Tension
Find it a little too difficult to push back or pull the lever of your Lazyboy recliner? Or does it recline too easily, lean too far back, or feel like it is not giving you enough support? One of the most useful features of many Lazyboy recliners is that they allow tension adjustment. This means you can fine-tune the reclining mechanism so the chair matches your size, body weight, strength, and personal comfort preference.
This is important because not every user will want the same reclining feel. If you are on the petite side, you may prefer to reduce the tension so it takes less effort to push the chair back and recline comfortably. On the other hand, if you are heavier or simply prefer a firmer reclining action, increasing the tension can help the chair feel more supportive and prevent it from leaning back too easily. A properly adjusted recliner usually feels smoother, more balanced, and more comfortable for everyday sitting, reading, watching TV, or napping.
In many cases, recliner tension problems are not caused by a major defect at all. Sometimes the chair simply needs a quick adjustment underneath. Other times, worn hardware or a weak spring may be part of the problem. Before assuming your recliner is damaged, it is worth checking the tension setting and making sure everything is adjusted correctly.
Why recliner tension matters
Recliner tension affects how easily the chair moves when you lean back and how much resistance the reclining mechanism gives you. If the tension is too loose, the chair may feel like it drops back too quickly or leans farther than you want. If the tension is too tight, it may become hard to recline at all, especially for smaller or lighter users. The right setting helps the recliner feel controlled, supportive, and more comfortable over long periods of use.
Common signs your recliner tension needs adjusting
There are a few common signs that usually tell you your Lazyboy recliner needs a tension adjustment. These include:
- The chair is too hard to recline
- The chair leans back too easily
- The reclining action feels uneven
- One side feels tighter than the other
- The chair no longer feels as supportive as it used to
- You recently moved, repaired, or heavily used the recliner and it now feels different
If you notice one or more of these problems, checking the tension adjustment is a smart first step before replacing any parts.
Feed don’t touch floor or leans too far back?
This is a common problem and has been asked a lot. So we wrote a dedicated article to solve this issue. You can view the article HERE.
How do you adjust the recliner tension?
Lazyboy recliners are typically equipped with either a pair of wing nuts or thumb wheels that allow you to adjust the reclining mechanism tension. To begin, make sure the leg rest is fully closed, then carefully tilt the recliner chair forward so you can access the underside. Depending on the model, you may find wing nuts or thumb wheels underneath the chair, either toward the back or closer to the center of the mechanism.
Some Lazyboy models use wing nuts, such as certain Reclina-Rocker and Reclina-Way chairs, while others use thumb wheels, such as some Reclina-Glider Swivel models. Even though the hardware may look a little different, both styles are adjusted in basically the same way.
How to increase tension
To increase reclining tension, turn both thumb wheels or wing nuts clockwise by one quarter turn. This makes the recliner harder to push back and can help if the chair feels too loose or leans back too far for comfort.
How to decrease tension
To decrease tension, turn both sides counter-clockwise by one quarter turn. This makes the chair easier to recline, which may be more comfortable for lighter users or anyone who finds the recliner too stiff.
Adjust both sides equally
It is very important to adjust both sides equally. If one side is tighter than the other, the recliner may feel uneven, twist slightly during movement, or wear out faster over time. After adjusting both sides by one quarter turn, return the recliner to its upright position and test it. Sit down, lean back, and see how the reclining action feels. If further adjustment is needed, repeat the process in small quarter-turn increments until you find the setting that feels right.
What you may need before adjusting
If the mechanism feels dry or stiff while you are making adjustments, it may help to inspect the moving parts and consider using a silicone spray lubricant for recliner parts. If you want to check the hardware more closely, having a flashlight for home repair and a pair of work gloves nearby can make the job easier and safer.
If the adjustment points are hard to reach, a adjustable wrench or needle nose pliers may also be useful depending on your chair model.
Important rule when adjusting recliner tension
When adjusting recliner tension, there is one very important rule: never loosen or tighten the thumb wheels or wing nuts all the way. Doing this can damage the tension spring or place too much stress on the mechanism. After making adjustments, check to make sure the spring does not move on the bolt. If it does, turn the thumb wheel or wing nut clockwise by at least another half turn until the spring no longer moves loosely on the bolt.
At the same time, the spring should not be fully compressed after adjustment. If the spring looks completely pressed down, loosen the thumb wheels or wing nuts slightly by turning them counter-clockwise by at least half a turn. The goal is to find a balanced setting where the mechanism feels secure, smooth, and comfortable without over-stressing the spring.
Tips for testing the new tension setting
After every adjustment, test the recliner before making another change. Sit in the chair the way you normally use it. Recline slowly, return to upright, and pay attention to whether the chair feels more natural. Small adjustments usually work better than large ones. It is better to fine-tune the tension gradually than to overcorrect it in one attempt.
Can body size affect the right tension setting?
Yes, absolutely. The best recliner tension setting often depends on the user. A lighter person may find a factory-tight setting difficult to use, while a heavier person may feel under-supported if the tension is too loose. That is why Lazyboy tension adjustment is such a helpful feature. It allows different users to personalize the recliner without changing major parts.
When tension adjustment is not enough
Sometimes the problem is not just the setting. If the chair still feels too loose, too stiff, noisy, or unstable after proper adjustment, the real problem may be a worn tension spring, stretched hardware, damaged mechanism, or another failing recliner part. In older chairs, parts naturally wear down and adjustment alone may no longer restore the original feel.
Do you need a new tension spring?
If your recliner still feels wrong even after proper adjustment, the tension spring itself may be worn, stretched, weak, or broken. In that case, adjustment alone may not solve the problem. A damaged spring can make the recliner feel too loose, too stiff, uneven, or unstable during use. If that happens, replacing the spring is often the next step.
You can easily find a recliner tension spring online, but make sure you order the correct replacement for your specific recliner model. It can also be helpful to compare recliner spring replacement options, recliner repair kit listings, and even a recliner handle replacement if your chair has multiple worn parts that may be affecting the reclining action.
Simple maintenance tips to keep tension working properly
A few simple habits can help keep your recliner tension feeling right for longer. Avoid dropping heavily into the chair, do not force the recliner backward suddenly, and inspect the underside occasionally for loose hardware or worn parts. If the mechanism looks dry or dusty, clean it carefully and use an appropriate silicone spray lubricant for recliner use. Catching small problems early can help prevent bigger repairs later.
Final thoughts
For ultimate comfort, make sure you keep your recliner tension adjusted to suit your needs. Lazyboy recliners are designed for relaxation, but they work best when the reclining mechanism matches your body and your comfort preference. A small adjustment underneath the chair can make a big difference in how easy it is to recline, how supportive the chair feels, and how enjoyable it is to use every day.
With the right tension setting for your size and build, your recliner can feel more natural, more supportive, and much more comfortable from the moment you sit down, kick your shoes off, and relax. If the chair still does not feel right after adjustment, inspect the spring and related hardware before the problem gets worse. A simple fix now can help extend the life of your recliner and keep it feeling the way it should.