
Lazyboy Recliner DIY Repair
Lazy Boy recliners are known for comfort, durability, and long-term use, but even a well-built recliner can develop problems after years of daily sitting, reclining, rocking, and footrest operation. Handles can loosen, springs can weaken, cables can snap, backrests can become unstable, and internal mechanisms can wear down.
The good news is that many Lazy Boy recliner problems do not automatically mean the entire chair needs to be replaced. A surprising number of issues can be repaired at home with basic tools, replacement parts, and a careful inspection of the mechanism underneath the chair.
Before starting any DIY recliner repair, make sure you identify the exact problem first. Many recliner symptoms can look similar even though the cause is different. For example, a footrest that will not open may be caused by a broken handle, a snapped cable, a disconnected linkage, or a damaged pawl and ratchet assembly.
Always work slowly, keep track of screws and brackets, and take clear photos before removing parts. Those photos can be very helpful when you need to reinstall the mechanism later.
Below you will find some of the most common Lazy Boy recliner problems, what usually causes them, and what you can do to repair them.
1. Broken pawl and ratchet assembly
The pawl and ratchet assembly is part of the recliner mechanism that helps control the chair’s movement as it moves backward and forward into different reclining positions.
The pawl is usually a small locking bar or lever that engages with the ratchet. The ratchet is the toothed component that allows the mechanism to move into position and remain there until the chair is adjusted again.
When either part becomes worn, bent, cracked, or misaligned, you may notice:
- The recliner does not stay in position
- The chair slips backward unexpectedly
- The mechanism clicks without locking
- The recliner feels loose or unstable
- The chair will not return smoothly to the upright position
To inspect the assembly, carefully turn the recliner over so you can access the underside. Use a flashlight to locate the mechanism and look for broken teeth, loose hardware, or a pawl that is no longer engaging properly.
If the assembly needs replacement, unscrew it from the base of the chair and remove the cap or retaining hardware that keeps the pieces together. Slide the ratchet away from the pawl and replace the worn or damaged component. Reassemble the cap and reinstall the mechanism in the same position.
Take photos before disassembly so you can compare the orientation when putting everything back together.
If the mechanism feels dry or stiff but does not appear broken, a small amount of appropriate recliner mechanism lubricant may help moving metal parts operate more smoothly. Avoid spraying lubricant directly onto upholstery or electrical components.
How to tell if the pawl and ratchet assembly is the real problem
Before replacing the assembly, make sure the issue is not simply a loose bolt or another disconnected component. Sometimes the mechanism appears broken because a mounting bolt has loosened and changed the alignment.
Check:
- Mounting bolts
- Pivot points
- Metal teeth on the ratchet
- Pawl alignment
- Nearby springs
- Loose linkage arms
If the metal itself is badly bent or the ratchet teeth are stripped, replacement is usually the better option.
2. Broken Lazy Boy backrest
The backrest of many Lazy Boy recliners can be removed from the base of the chair. This makes transportation easier and also provides access to the internal mounting brackets.
A backrest problem can include:
- A loose backrest
- A backrest that rocks from side to side
- A damaged locking bracket
- Broken internal support
- Worn padding
- Torn upholstery
- A back that will not lock into the chair properly
If the backrest itself has become damaged, you do not necessarily need to replace the whole recliner. Depending on the model, you may be able to find a compatible used backrest or repair the existing one.
If you decide to use a replacement backrest from another chair, model compatibility is extremely important. The mounting brackets must line up correctly and the back should sit at the correct height and angle.
Because it can be difficult to find a used replacement in the same color and material, you may also need to reupholster the backrest so it matches the rest of the chair.
A professional upholsterer can usually handle this type of repair, but experienced DIYers may also attempt it. The foam filling must be shaped correctly and attached securely before new upholstery is installed.
If the old upholstery is still intact, it can sometimes be used as a pattern when cutting the replacement material.
You may want to compare products such as high-density upholstery foam, recliner upholstery fabric, or a staple gun for upholstery if you are repairing the padding and cover yourself.
Check the backrest brackets before replacing the whole back
Sometimes the backrest is not actually broken. The problem may be a loose or partially engaged locking bracket.
Remove the chair back carefully and inspect both mounting brackets.
Look for:
- Bent metal
- Loose screws
- Missing clips
- Misaligned locking tabs
- Cracked mounting hardware
If the brackets are intact, reinstalling the back correctly may solve the problem without replacing anything.
3. Broken seat springs
Broken seat springs are another common problem in older recliners.
The springs underneath the seat provide support and help distribute body weight. When one or more springs become weak or break, the seat may suddenly feel softer, lower, or uneven.
Common symptoms include:
- The seat feels saggy
- One side sits lower than the other
- You feel a hard spot under the cushion
- The chair makes popping or creaking noises
- The seat no longer provides enough support
Replacing recliner springs can be more difficult than replacing a handle or cable because the springs may remain under tension.
If you still want to attempt the repair yourself, start by removing the backrest if necessary. Turn the recliner over and use a flashlight to inspect the spring system underneath the seat.
Locate the damaged spring and identify how it is attached.
If it uses retaining bolts, loosen one end first and carefully pull the spring away from the chair. Then remove the second end.
Install the new spring in the reverse order and make sure the mounting points are secure.
Never work directly in line with a stretched spring because it can snap back suddenly if it slips from your tools.
You can compare recliner replacement springs before ordering, but make sure the length, hook style, and spring type match your original part.

Yoogu 2-1/2 inch Overall Length Recliner Chair Tension Spring Part | 8 PCS
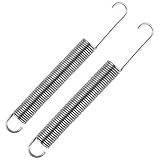
Zookpr 2Pcs 7 Inch Recliner Springs Replacement Sofa Chair Mechanism Spring
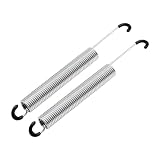
yaaqoo 2 PCS 7 Inch Recliner Sofa Chair Mechanism Spring Parts | Long Neck
Should you replace only one spring?
If one spring has broken, inspect the surrounding springs carefully.
A single failed spring may be an isolated problem, but if the chair is old, nearby springs may also be stretched or weakened.
Replacing several badly worn springs at the same time can help prevent uneven support and reduce the need to open the recliner again soon.
4. Broken or loose recliner handle
The reclining handle is one of the most frequently used parts of a manual Lazy Boy recliner, so it is not unusual for it to loosen, crack, or break after years of use.
You may notice:
- The handle feels loose
- The handle moves but nothing happens
- The handle is cracked
- The footrest no longer releases
- The handle pulls out farther than it used to
Before buying a replacement handle, inspect the cable as well. A handle can appear broken when the real problem is a snapped or disconnected release cable.
If the handle itself is damaged, remove the screws or bolts holding it to the chair and disconnect the cable or linkage.
Measure the mounting hole spacing and connector style before ordering a replacement.
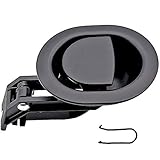
You can browse a recliner handle replacement to compare common shapes and mounting styles.
5. Snapped recliner release cable
A snapped release cable is one of the most common reasons a manual recliner footrest suddenly stops opening.
The cable runs between the handle and the release mechanism underneath the chair. Every time the handle is pulled, the cable transfers that movement to the mechanism.
Over time, the cable can:
- Stretch
- Fray
- Snap
- Detach from the handle
- Pull free from the release lever
- Develop cracks in the outer housing
If the handle suddenly feels very loose and the footrest no longer responds, inspect the cable first.
Tilt the chair carefully and trace the cable from the handle to the mechanism. Look for broken strands or disconnected ends.
Before buying a new cable, compare:
- Total cable length
- Exposed wire length
- Handle connector
- Mechanism connector
- Outer housing style
A recliner replacement cable can be inexpensive, but ordering the wrong length is a common mistake.
6. Footrest will not open
If the footrest refuses to open, do not assume the entire reclining mechanism has failed.
Possible causes include:
- Broken handle
- Snapped cable
- Disconnected linkage
- Weak or broken spring
- Jammed mechanism
- Bent metal bracket
Start with the easiest parts to inspect.
Check the handle and cable first. Then examine the mechanism underneath the chair while someone gently operates the handle.
If the cable moves but the mechanism does not release, the problem may be the latch or linkage.
If nothing moves at all, the cable or handle is more likely to be the problem.
7. Footrest will not stay closed
A footrest that keeps popping open can be just as frustrating as one that will not open.
This may happen because:
- The closing spring has weakened
- The locking mechanism is worn
- The ratchet assembly is damaged
- The linkage is bent
- A bolt has loosened
Inspect the underside of the recliner and look for loose hardware or springs that appear stretched.
Do not force the footrest closed repeatedly because this can place extra stress on the mechanism.
8. Recliner leans to one side
If the chair appears uneven or leans to one side, the issue may be caused by the frame, springs, mechanism, or loose mounting hardware.
Check:
- Frame bolts
- Seat springs
- Reclining mechanism
- Base or swivel mechanism
- Floor level
It is also worth moving the chair temporarily to another part of the room to make sure the floor itself is not uneven.
If the recliner still leans on a level surface, inspect the frame carefully for loose or damaged components.
9. Recliner makes squeaking or grinding noises
Recliners contain many metal pivot points, springs, and moving joints. Over time, some of these parts can begin making noise.
A small squeak does not always mean something is broken.
Dust, friction, and dry pivot points can all create noise.
Turn the chair over and locate the source while someone slowly operates the reclining mechanism.
If the noise comes from a metal pivot rather than a broken part, applying a small amount of appropriate silicone spray lubricant for recliner may help.
Wipe away excess lubricant and keep it away from fabric, leather, electrical connections, and wooden surfaces.
10. Recliner feels too loose or too difficult to push back
Some Lazy Boy recliners allow tension adjustment.
If the chair reclines too easily, the tension may need to be increased. If it takes too much effort to lean back, the tension may need to be reduced.
Adjustment is usually made using tension springs, wing nuts, or thumb wheels underneath the chair.
Make small adjustments on both sides equally.
Do not tighten or loosen the adjustment hardware completely because excessive adjustment can damage the springs or mechanism.
If the spring is already stretched, broken, or badly worn, adjusting it may not solve the problem and replacement may be necessary.
11. Power recliner does not move
Power Lazy Boy recliners introduce several electrical components that manual recliners do not have.
If your power recliner stops working, possible causes include:
- Loose wall plug
- Disconnected power cable
- Bad transformer
- Faulty hand control
- Broken switch
- Loose motor connector
- Failed motor
- Damaged wiring
Start with the simplest checks.
Make sure the outlet works by plugging another device into it. Then inspect the recliner power cord and transformer.
Disconnect and reconnect accessible plugs firmly.
If the transformer has an indicator light, check whether it is illuminated.
Common replacement parts include a recliner power supply transformer, recliner power switch, and recliner hand control remote.
Always match voltage, amperage, connector type, and polarity before replacing electrical components.
12. Power recliner is stuck in the open position
If a power recliner becomes stuck with the footrest extended, do not force the mechanism closed manually.
First check the power outlet and transformer.
Then inspect the wiring underneath the chair to make sure no connector was accidentally pulled loose.
Look especially closely at cables near moving parts because repeated reclining can occasionally place stress on connectors or wiring.
If the power system appears active but the motor does not respond, the switch, motor, or control box may need further diagnosis.

Power Recliner Power Supply, AC/DC Switching Power Supply Transformer 2-pin 29V/24V 2A Adapter with AC Power Cord for Electric Power Recliner Lift Chair

Power Recliner Power Supply, Sopito 2-Pin AC/DC Adapter 100-240V 50/60hz

Power Recliner Power Supply, Replacement Recliner Power Cord,2-Pin AC/DC Adapter 100-240V, Quality 29V 2A Switching Transformer, Replacement Part for Recliner Couch,Electric SofaLift Chair (1, 1)
13. Recliner seat is sagging
A sagging recliner seat is not always caused by the cushion alone.
Possible causes include:
- Flattened foam
- Broken springs
- Stretched webbing
- Damaged seat support
- Heavy long-term use
Press down on different areas of the seat and compare how they feel.
If the foam feels flat but the support underneath is solid, replacing or rebuilding the cushion may solve the problem.
If you can feel a sudden dip or hard edge, inspect the springs and seat support underneath.
Products such as high-density upholstery foam may be useful for cushion rebuilding if the original foam has lost its shape.
14. Torn fabric or damaged leather
Upholstery damage does not always require full reupholstery.
Minor fabric tears may sometimes be repaired from underneath with upholstery stitching or a patch.
Small leather scratches and minor damage may sometimes be improved with a leather furniture repair kit.
More serious damage, particularly on expensive upholstery, may be better handled by a professional upholsterer.
Always test dyes, cleaners, and repair materials in a hidden area first.
15. Loose bolts and hardware
One of the easiest problems to fix is also one of the most commonly overlooked.
Recliners contain many bolts, screws, and pivot points. Repeated movement can gradually loosen them.
Symptoms include:
- Clicking noises
- Wobbling
- Uneven movement
- Loose arms
- Side-to-side movement
Inspect the underside periodically and tighten loose hardware carefully.
Do not overtighten bolts because this can strip threads or prevent pivot points from moving correctly.
A basic socket wrench set and screwdriver set are useful for many basic recliner repairs.
16. Switching the handle
Even if your Lazy Boy recliner is not broken, there are certain modifications some owners consider for comfort or convenience.
If, for instance, you would prefer the handle on the opposite side of the chair, you may be tempted to move it.
First locate the square rod or release mechanism underneath the seat and identify how the existing handle connects to it.
Remove the screws or fasteners securing the handle and carefully detach it from the mechanism.
Before drilling any new holes, inspect the opposite side of the frame to make sure there are no structural parts, wires, upholstery seams, or mechanisms in the way.
Keep in mind that not every recliner is designed for the handle to be swapped from one side to the other.
Modifying the frame or drilling through the upholstery can damage the chair or affect warranty coverage. For that reason, this modification is best attempted only if you fully understand the chair’s construction.
Basic tools worth keeping for recliner repairs
If you plan to maintain your own recliner, a small repair kit can make troubleshooting much easier.
Useful tools include:
- Phillips and flathead screwdrivers
- Adjustable wrench
- Socket wrench set
- Needle-nose pliers
- Locking pliers
- Flashlight
- Tape measure
- Work gloves
- Safety goggles
A basic home repair tool kit will usually contain many of the tools needed for common recliner repairs.
Always take pictures before removing parts
This simple habit can save a lot of frustration.
Before removing a spring, cable, handle, motor, bracket, or mechanism, take several photos from different angles.
Photograph:
- The original cable routing
- Spring attachment points
- Electrical connectors
- Bolt locations
- Bracket orientation
If you forget how something was installed, your photos can serve as a reference during reassembly.
How to identify the correct replacement part
Never buy recliner replacement parts based only on appearance.
Many handles, cables, transformers, springs, and switches look almost identical but use different dimensions or connectors.
Before ordering, compare:
- Overall dimensions
- Mounting hole spacing
- Cable length
- Exposed cable length
- Connector shape
- Voltage
- Amperage
- Part numbers
- Left or right-side mounting
If the original part has a label or number printed on it, take a photo and use that information when searching.
When should you call a professional?
DIY repairs are useful for simple problems, but some repairs are better left to an experienced furniture technician.
Consider professional repair if:
- The metal frame is cracked
- The mechanism is badly bent
- You cannot safely remove a tensioned spring
- Electrical wiring is damaged
- The motor repeatedly overheats
- The recliner is still under warranty
- The repair requires welding
- You are unsure whether the replacement part is compatible
The goal of DIY repair is to save money without making the chair less safe.
When is it better to replace the recliner?
Not every old chair is worth repairing.
Replacement may make more sense if:
- The frame is badly damaged
- Several major parts have failed
- The upholstery is heavily worn
- The cushions need complete replacement
- Power components have multiple faults
- Replacement parts are unavailable
- Repair costs approach the price of another chair
If only one handle, cable, spring, or electrical component has failed, repair is usually worth considering.
Where to buy Lazy Boy recliner parts?
On this page, we list many of the Lazy Boy recliner parts you can buy and where to buy them.
Common replacement parts include:
- Recliner handles
- Release cables
- Tension springs
- Seat springs
- Power transformers
- Hand controls
- Power switches
- Motors
- Bolts and brackets
- Upholstery repair supplies
Before purchasing any replacement part, inspect your original component carefully and compare dimensions, mounting points, electrical specifications, and connectors.
Final thoughts
Lazy Boy recliners are built to provide years of comfort, but regular use eventually causes wear on mechanical, electrical, and upholstered components. Fortunately, many common problems can be repaired without replacing the entire chair.
Start with a careful diagnosis. A footrest problem may only require a new cable. A loose backrest may simply need its brackets reseated. A sagging seat may be caused by foam or springs rather than the frame. A dead power recliner may only have a loose connector or failed transformer.
Repair one problem at a time, photograph everything before disassembly, use compatible parts, and never force a mechanism that refuses to move.
With basic maintenance and timely replacement of worn components, a Lazy Boy recliner that appears to be reaching the end of its life may still have many comfortable years left.

ttmagic Metal Recliner Handle Replacement Parts with Cable, Universal Recliner Sofa Chair Couch Release Lever Pull Handle, Fits Ashley and Major Recliner Brands, Exposed Cable Length 4.9“
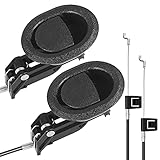
Baridwon Recliner Replacement Parts with Pull Handle and Release Cable (2-Sets), Repair Recliner Mechanism Parts Compatible with Most Furniture of Recliner Sofa Couch Chair
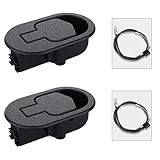
Baridwon 2 Set Recliner Replacement Parts, Durable Recliner Release Pull Handle with Recliner Pull Cable, Repair Replacement Parts Compatible with Most Furniture of Recliner Chair Sofa Couch
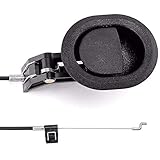
ttmagic Sofa Chair Recliner Release Pull Handle 3" by 3.5" Replacement Parts with Cable, Fits Ashley Lazy Boy and Most Recliner Brands Couch Sofa Chair Furniture, Exposed Cable Length 4.9"

Baridwon 2 Sets Recliner Replacement Parts - Metal Recliner Handle, Release Pull Cable Fits Ashley & Most Recliner Sofas, Exposed Cable Length 5.1 Inches
I have 2 recliner chairs and one of the wooden handles broke and we can not find a replacement handle anywhere.
Hello La Z–Boy,
My 89 year old in-laws bought two matching leather La Z-Boy recliners about five years ago. They also bought the five year repair protection plan. It just ran out. One chair is fine, no problems. The other, now has a seam that is splitting open on the back just below the head rest and is separating, and the head rest area is badly discolored. DID I MENTION, THEIR *89″ YEARs OLD!!! My in-laws are lasting longer than your great chairs! LOL! Their like the “Lee and Morty”, (Swiffer commercials), of La-Z-Boy! Isn’t that worth something in advertising or a little help in repairing it for them, especially since their extended “five year repair warranty” just lapsed! Any help out there? Thanks, Tim Collins Antioch, Illinois. They live in Grayslake, Illinois a few miles away from us and bought both chairs a a local Laz-Z-Boy store.
Where can I purchase a new pawl and ratchet assembly? This just stopped working on my lay-z-boy maverick recliner. I keep seeing do it yourself solutions, but not where I can buy the part.
Can’t get rachet off of recliner to install new one. Need a video please
MY lazy boy bearings on the slides have worn out. I WOULD LIKE TO REPLACE THEM.
Robert
You discuss repairing the ratchet and pawl assembly as a diy project but there is no place to purchase the parts. I was told to consult my local dealer who was of absolutely no help. They will not repair the recliner because it was not purchased there, nor would they assist with ordering the parts. It seems pretty straight forward to repair if I could get the parts. Could you please advise how to go about getting a replacement assembly? Thanks.
How do I remove the ratchet from the chair to replace it. Do I remove the fabric to expose screws or what. I’ve replaced the pawl but can’t see access to remove the ratchet
Do I have to remove the fabric to access the screws in order to replace the ratchet ?
Where can I buy ratchet and pawl?
I need a new pawl cap for my rocker recliner , does anyone know where I can get one
Parts for most issues can be found on eBay. I have a small store on there and try to keep a few parts in stock for purchase. Just get on Ebay and search for La-Z-Boy chair parts (ratchet and pawl assembly) etc.
As for getting to the parts so you can replace them. You’ll have to peel back the fabric to get to the screws for the ratchet. I usually just cut it left, right and top to make a square and then just staple it back on afterward. The pawl is a little trickier. You’re going to want to make some 1 1/2″ blocks to fit under the four sides of the springs. If you don’t do this, when you unscrew those springs you’ll never get the base to line back up with the holes. Once you have those under the springs, go ahead and unscrew the base, flip it back and you’ll be able to unscrew the pawl.
I have a Lazy-Boy recliner that I found in a neighbor’s barn about 45 years ago, had it reupholstered (it had harvest gold naugahyde on it originally) and it has been in use ever since a month ago. The foot rest will not raise. I was told that the new pawl & ratchet won’t fit anymore. Do you have any recommendations for how to repair it? I just can’t throw it away!!!
Thanks for your advice! 🙃