
How to Replace the Cables on a Lazyboy Recliner Handle
The cable that runs from your Lazyboy recliner handle to the release mechanism is what lets the footrest pop open when you pull the handle. Over time, that cable can stretch, fray, or snap. Sometimes the plastic sheath cracks, the metal hook bends, or the cable slips out of its bracket. The result is a handle that feels loose, pulls with no resistance, or does nothing at all. Replacing the cable is usually a straightforward DIY job. With a compatible replacement cable, a few basic tools, and a careful look at how your existing cable is routed, you can get your recliner working again in less than an afternoon.
What You'll Need Before You Start
Having the right tools and parts on hand will make the job quicker and a lot less frustrating.
- Replacement recliner cable compatible with Lazyboy-style handles – you can start with a search for a Lazy Boy recliner release cable.
- Possibly a new handle if yours is cracked – look for a recliner pull handle with cable kit.
- Phillips and flathead screwdrivers, or a simple ratcheting screwdriver set.
- Needle-nose pliers for removing clips and bending hooks.
- Staple remover or putty knife (if you need to peel back the dust cover).
- Flashlight or headlamp so you can see under the chair.
- Zip ties to secure the new cable along its path.
If you want a deep-dive walkthrough dedicated specifically to D-ring style cables, there is an excellent step-by-step article on how to replace and install a Lazyboy recliner cable D-ring that pairs well with this guide.

ttmagic Metal Recliner Handle Replacement Parts with Cable, Universal Recliner Sofa Chair Couch Release Lever Pull Handle, Fits Ashley and Major Recliner Brands, Exposed Cable Length 4.9“
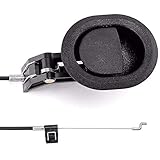
ttmagic Sofa Chair Recliner Release Pull Handle 3" by 3.5" Replacement Parts with Cable, Fits Ashley Lazy Boy and Most Recliner Brands Couch Sofa Chair Furniture, Exposed Cable Length 4.9"

KUANYUOO Universal Heavy-Duty Metal Pull Recliner Handle with Cable (Exposed Adjustable 4.7" to 5.2"), Fits Ashley and Other Manufacturer Brands Chair Release Handle for Sofa or Recliner
Step 1: Confirm the Cable Is the Real Problem
Before you start pulling things apart, it is smart to make sure the cable is actually at fault.
- Pull the handle and pay attention to how it feels. A “floppy” handle with no resistance often means the cable has snapped or come loose.
- Watch the mechanism under the chair (you may need a helper). If nothing moves when you pull the handle, the cable is likely broken or disconnected.
- If the mechanism moves but the footrest does not release, you may have a separate footrest or lock problem.
- Visually inspect the cable where it exits the handle and where it connects near the mechanism. Frayed strands, kinks, or a detached hook are clear signs that a replacement is needed.
If you suspect there might be additional issues beyond the cable itself, you can use the broader checklist in how to troubleshoot your Lazyboy recliner to rule out other problems at the same time.
Step 2: Remove the Handle from the Side of the Recliner
Most Lazyboy-style handles are secured with a couple of screws through a plastic or wooden bezel.
- Locate the screws around the handle. They are usually on the inside of the arm or directly on the handle housing.
- Use the appropriate screwdriver to remove these screws and set them aside somewhere safe.
- Gently pull the handle assembly away from the side of the chair. The cable will still be attached, so let it hang carefully rather than yanking it out.
- Take a photo of how the cable attaches to the handle – this will make reassembly much easier later.
If your handle is cracked, worn, or wobbly, this is also the perfect time to upgrade it with a more durable metal-style replacement handle and cable combo.
Step 3: Flip the Recliner and Expose the Mechanism
Next, you will need to see where the cable hooks into the reclining mechanism.
- Carefully turn the recliner onto its side or front so you can access the underside. Protect the upholstery with a blanket if needed.
- Locate the dust cover (black or thin fabric) under the seat. On some chairs, you can work around it; on others, you may need to loosen one edge.
- If necessary, use a staple remover or putty knife to lift enough of the dust cover to reach the cable and mechanism connection point.
- Follow the existing cable from the handle side into the chair until you find where it attaches to the metal latch or release lever.
Take another photo of the cable path and attachment point. These pictures are your “map” when routing the new cable.
Step 4: Disconnect and Remove the Old Cable
Once you can see both ends of the cable, you are ready to remove it.
- At the mechanism end, locate the hook, eyelet, or fitting that attaches the cable to the release lever.
- Use needle-nose pliers to unhook the cable from the lever. Be mindful of springs and moving parts.
- Look for any retaining clips or brackets that hold the cable sheath in place. Gently pry these open or slide the cable out.
- From the handle side, release the cable from the handle assembly (usually by lifting a small metal tab or sliding the cable end out of its slot).
- Pull the cable out of the chair, taking note of how it was routed around springs, bars, and other hardware.
Once the old cable is out, set it on a table so you can use it as a template for your replacement.
Step 5: Match and Prepare the New Cable
Getting the right replacement cable is crucial. Length and end fittings must be correct for smooth operation.
- Lay the old cable next to your new one. Compare the overall length, exposed inner cable length, and sheath length.
- Make sure the handle end and mechanism end hardware (D-ring, S-hook, barrel, etc.) match your original.
- If your new cable is slightly longer than the original, that is usually okay as long as the exposed length is close. Too short, however, will not work.
- If you haven't ordered a cable yet, you can use your old cable measurements to find a suitable replacement by searching for a recliner cable D-ring replacement.
If you are unsure about specs or where to source parts, the article on finding Lazyboy recliner parts has practical tips about measurements and where to buy.

YEYETUO Sofa Recliner Cables, 2PCS Release Cables Replacement D Ring Pull Handle, Recliner Replacement Parts Hook Exposed Length 4.75 Inch, Total Length 36.5 Inch

Nonley Sofa Recliner Cables, 2 Pack Couch Release Cables Recliner Replacement Parts D Ring Couch Recliner Pull Handle, Hook Exposed Cable with S Tip for Sofa, Black
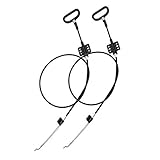
2 Pieces Recliner Release Cable Replacement D-Ring Pull Handle, Exposed Length 4.75" with S Tip
Step 6: Route and Install the New Cable
Now you are ready to install the new cable along the same path as the old one.
- Starting from the handle side, feed the new cable through the arm opening and into the body of the chair, following the same route as the original.
- Snap or slide the cable sheath into any brackets or guides that kept the original cable in place. This prevents rubbing or pinching when you recline.
- Use zip ties to secure the cable to the frame where needed, but do not over-tighten – the cable should be held, not crushed.
- At the mechanism end, hook the cable into the latch or release lever exactly as the old one was attached.
- Reinstall any retaining clips that hold the cable sheath in position.
Keep checking that the cable moves freely when you pull on the handle end. There should be no sharp bends or kinks.
Step 7: Reattach the Handle and Fine-Tune the Tension
With the cable installed, you can now reassemble the handle.
- Attach the cable end to the handle assembly the same way the original was installed – usually by slipping a barrel or pin into a slot.
- Position the handle back into its opening on the side of the chair.
- Reinstall the mounting screws and tighten them evenly so the handle sits flat and secure.
- Test the handle a few times with the chair still on its side. The mechanism should move smoothly, and the footrest should release firmly when fully assembled.
If it feels like you have to pull the handle too far or the footrest pops open with barely any movement, you may need to adjust where the cable hooks into the mechanism (using a different hole or notch) or try a slightly different cable length.
Step 8: Close the Dust Cover and Test the Recliner
Once everything feels right, you can button the chair back up.
- Return the dust cover to its original position and re-staple or reattach it if you pulled it back earlier.
- Carefully roll the recliner back onto its feet.
- Sit in the chair and test the handle multiple times: open, close, and partially recline to make sure the cable does not bind.
- Listen for any rubbing, scraping, or popping noises that might indicate the cable is catching on something inside.
If everything works smoothly, your new cable is properly installed and ready for regular use.
When to Replace the Entire Handle and Cable Assembly
In some cases, it makes more sense to replace the handle and cable as a complete unit instead of just the cable.
- If the handle is cracked, loose, or badly worn, a fresh assembly will feel sturdier and last longer.
- If the mechanism end hardware on your old cable is badly bent or corroded, a complete recliner handle replacement with cable is often the simplest solution.
- If you are not sure which specific cable your model uses, handle+ cable kits give you matched parts and save some guesswork.
Safety and Warranty Tips
Replacing a handle cable is generally safe, but there are a few extra points to keep in mind.
- Always unplug power before working on electric recliners.
- Be aware that springs and moving parts can pinch fingers; never put your hands in the path of a moving mechanism.
- If your recliner is still under warranty, check whether the cable and handle are covered before buying parts yourself.
- For complex or multiple issues (cable plus frame or motor problems), it may be worth combining your cable replacement with other repairs in a fuller DIY session or calling in professional help.
Conclusion
A broken or stretched cable on a Lazyboy recliner handle can make an otherwise comfortable chair feel useless, but the fix is usually well within DIY reach. By carefully removing the old cable, matching a proper replacement, and routing it along the original path, you can restore smooth handle action and reliable footrest release.
If you take photos as you go, label your parts, and follow structured guides like the dedicated D-ring replacement tutorial and the general troubleshooting resources on LazyboyReclinersOnline.com, you will not only save money on repairs but also gain confidence in maintaining your recliner for years to come.

ttmagic Universal Heavy-Duty Metal Sofa Chair Recliner Release Pull Handle Replacement Parts, Fits Ashley, Lazy Boy and Most Recliner Brands, 3.5" x 3" Handle Size
$13.99 (as of April 4, 2026 20:31 GMT -05:00 - More infoProduct prices and availability are accurate as of the date/time indicated and are subject to change. Any price and availability information displayed on [relevant Amazon Site(s), as applicable] at the time of purchase will apply to the purchase of this product.)
EDO Metal Recliner Handle Replacement Parts with Cable, Universal Sofa Chair Couch Release Lever Pull Handle, Fits Ashley and Major Recliner Brands Manufacturers, Exposed Cable Length 4.7"
25% Off
ttmagic Sofa Chair Recliner Release Pull Handle 3" by 3.5" Replacement Parts with Cable, Fits Ashley Lazy Boy and Most Recliner Brands Couch Sofa Chair Furniture, Exposed Cable Length 4.9"
28% Off